Reviewing the Approval Report
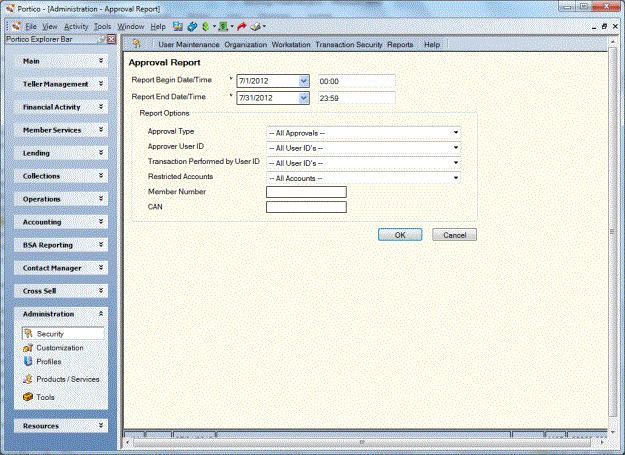
The Approval Report window lets you track the transaction approvals completed. To access the Approval Report window, select Security on the Administration menu on the Portico Explorer Bar. On the Security menu bar, select Reports, then select Approval Report.

How do I? and Field Help
You can display the report by date range, type of approval, approver user ID, user that completed transaction, restricted accounts, member number and CAN.
To enter a date range...
- Select the Report Begin Date down arrow to select a beginning date from the calendar or enter the date in MM/DD/YYYY format. Then, enter the beginning time in HH:MM:SS format. The system default is 00:00.
- Select the Report End Date down arrow to select an ending date from the calendar or enter the date in MM/DD/YYYY format. Then, enter the ending time in HH:MM:SS format. The system default is 23:59.
You can use the fields in the Report Options group box to search for specific information.
- To generate a report by approval type, select the approval type from the Approval Type drop-down list.
- To generate a report by approver, select the user ID of the approver from the Approver User ID drop-down list.
- To generate a report by the user who requested the approval, select the user ID of the user from the Transaction Performed by User ID drop-down list.
- To generate a report by the type of account restriction, select the account restriction type from the Restricted Accounts drop-down list.
- To generate a report by member number, enter a member number in the Member Number field.
- To generate a report by the computer-assigned number (CAN) of the transaction, enter the CAN associated with the transaction in the CAN field.
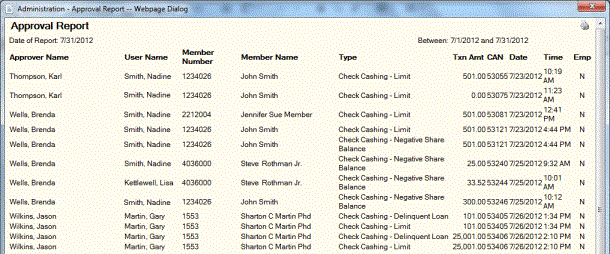
Select OK to generate the report. Select Cancel to close the window without generating the report.

Select the printer icon to print the report.