Creating Credit Union Messages
You can create credit union messages that will appear on the main Portico window for a specified period of time.
To view a list of credit union messages, under Administration on the Portico Explorer Bar, click Tools. On the Tools top menu bar, click Messages, then click Credit Union. The Credit Union Messages - List window appears. The Credit Union Messages - List window lists the available credit union messages, including the type of message, start date and end date.
- To create a new message, click New to open the Credit Union Messages - New window.
- To modify an existing message, click the message description in the Subject column to open the Credit Union Messages - Update window.
- To delete a message, select the message, then click Delete.
- Click All to select all the messages listed.

How do I? and Field Help
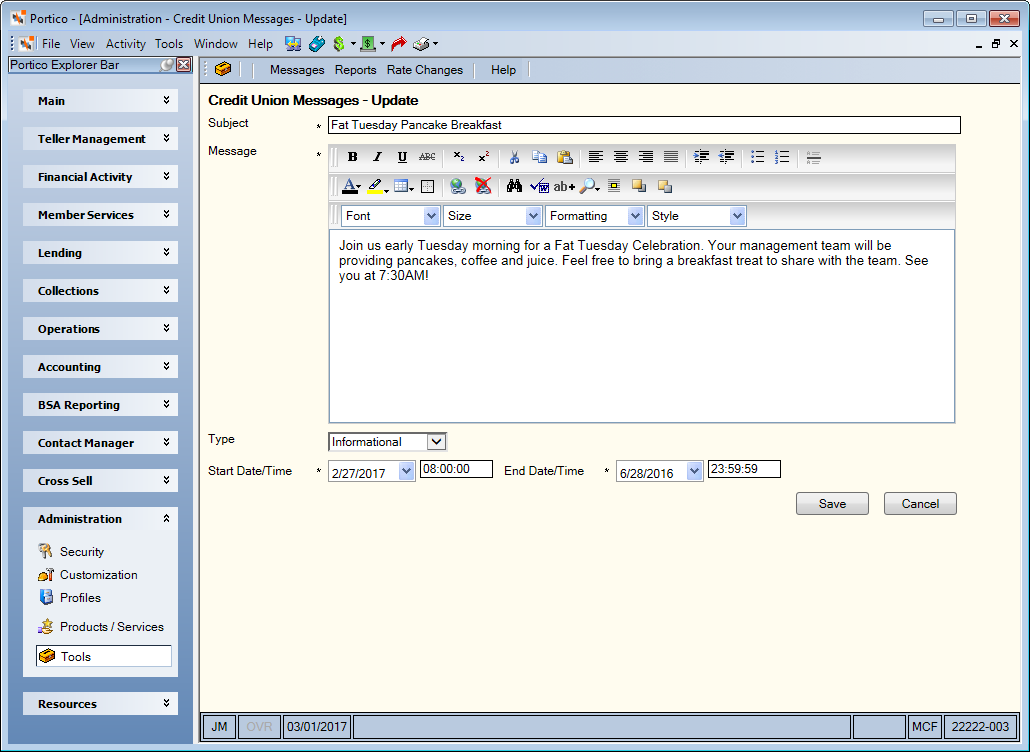
To create or modify a message on the Credit Union Messages - New/Update window, complete the following steps:
- In the Subject field, enter a short description of the credit union message. Length: 40 alphanumeric
- Enter your credit union message in the Message box. You can use the formatting toolbars to customize your message with specific fonts, sizes, bullets, hyperlinks, tables, and more.
- Click the Type down arrow to select the type of message: Informational or Urgent.
- Click the Start Date down arrow to select the beginning date the credit union message will appear from the calendar or enter the date in MM/DD/YYYY format. For new credit union messages, the system default is today's date. Messages can be effective dated into the future for events beginning on a certain date. In the Start Time field, enter the start time the credit union will appear in HH:MM:SS military format. System default is the current time.
- Click the End Date down arrow to select the date the credit union message will no longer appear from the calendar or enter the date in MM/DD/YYYY format. After the end date is reached, the message will no longer appear when the user logs into Portico. In the End Time field, enter the time the credit union message will no longer appear in HH:MM:SS military format.
- Click Save to save the credit union message and close the window.
Click Cancel to close the window without saving the credit union message.
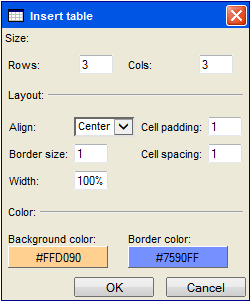
To insert a table, click the Table icon, then click Insert New Table. Indicate the number of rows and columns. You can select a background color and border color. Then, click OK.

To add a hyperlink, click the Insert Link icon. Enter the URL and click OK.

To access the menus and windows, users must be assigned to the Portico - Tools - Messages security group or you can add these permissions to a credit union-defined security group using the Security Group Permissions – Update window.
- Portico - Messages - Menu Option
- Portico - Messages - Credit Union - Menu Option
- Portico - Messages - Credit Union - View Only
- Portico - Messages - Credit Union - Maintain