Adding Endorsement Group Items
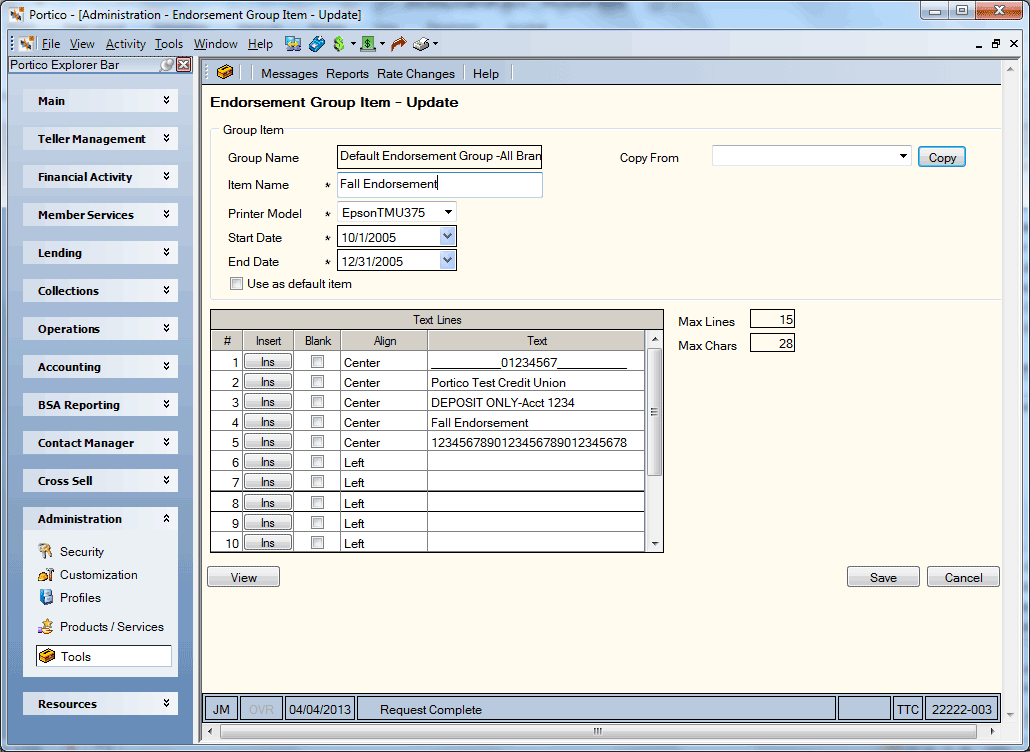
You can create endorsements to be printed on checks received. To access the Endorsement Group Item - New/Update window, on the Portico Explorer Bar, click Tools under the Administration menu. On the Tools menu bar, click Messages, and click Endorsements. To edit the endorsement group, click the group name. To add a new endorsement group, click New. On the Endorsement Group - Update window, click New to display the Endorsement Group Item - New/Update and add a new group item.

How do I? and Field Help
On the Endorsement Group Item - New/Update window, the name of the endorsement group appears in the Group Name field.
Enter the name of the endorsement item in the Item Name field. Click the Printer Model down arrow to select the printer that will print the endorsement.
Click the Start Date down arrow to select the first day the system should print the endorsement from the pop-up calendar or enter the date in MM/DD/YYYY format. Click the End Date down arrow to select the last date the system should print the endorsement from the pop-up calendar or enter the date in MM/DD/YYYY format.
Select the Use as default item check box to set the item as the default item.
To copy the endorsement text from another endorsement item, select the endorsement item from the Copy From drop-down list and click Copy.
In the Text Lines box, enter the endorsement text.
| Column Heading | Description |
|---|---|
| # | The line number of the endorsement. |
| Insert | Click Ins to insert a blank row above the row. If you insert a blank line by accident (no text is entered and the Blank check box is not selected), when you click Save to save your changes, the system removes the blank row. |
| Blank | Select the Blank check box to designate the row as a blank line. |
| Align | Click the Align down arrow to select the alignment. |
| Text | The endorsement text |
The maximum number of lines and maximum number of characters available appear to the right of the Text Lines box.
Click View to preview the endorsement text.