Adding Header and Footer Items
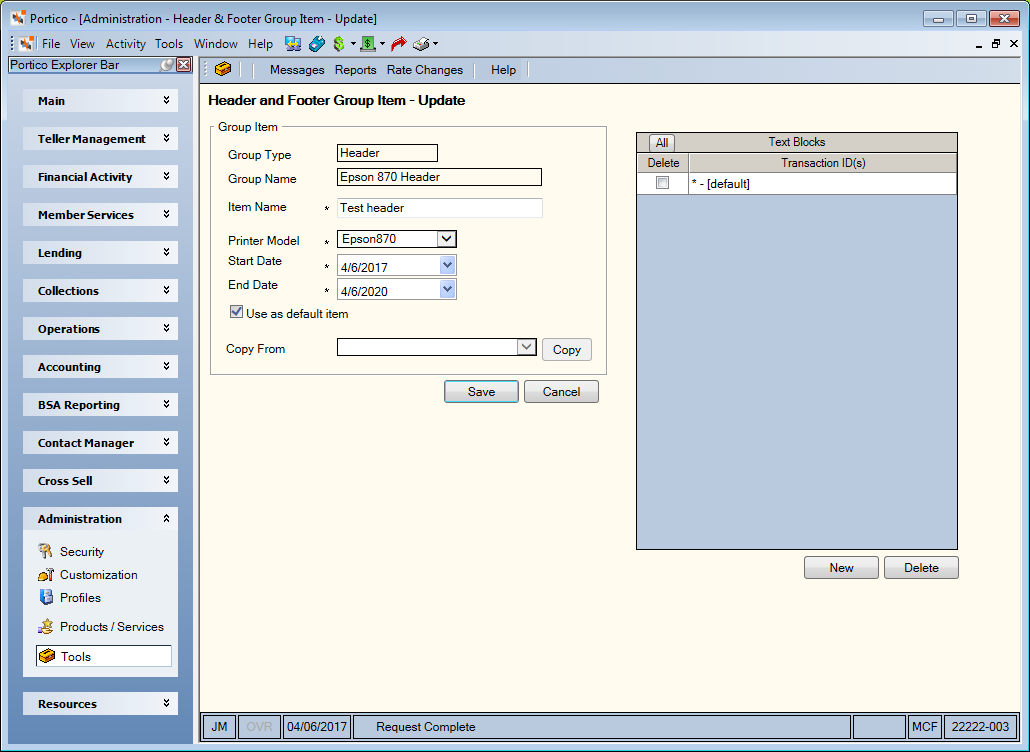
The Header and Footer Group Item - New/Update window lets you add or update a header or footer item. To access the Header and Footer Group Item - New/Update window, on the Portico Explorer Bar, click Tools under the Administration menu. On the Tools menu bar, click Messages, point to Receipts, and click Headers and Footers.
Click the Group Type down arrow to select Header or Footer. To add a new header or footer group, click New. The Header and Footer Group - New window appears.
To modify an existing header or footer group, click the group name in the Name column to display the Header and Footer Group - Update window.
Click New to add a new group item. The Header and Footer Group Item - New/Update window appears.

How do I? and Field Help
The Group Type field displays the group type: Header or Footer. The Group Name field displays the name of the header or footer group.
To add a header or footer item, complete the following steps:
- Enter the item name in the Item Name field.
- Click the Printer Model down arrow to select the printer that will print the header or footer.
- Click the Start Date down arrow to select the first day the system should print the header or footer from the pop-up calendar or enter the date in MM/DD/YYYY format.
- Click the End Date down arrow to select the last date the system should print the header or footer from the pop-up calendar or enter the date in MM/DD/YYYY format.
- Select the Use as default item check box to set the item as the default item.
- Click Save to save the header or footer item. Click Cancel to cancel your changes and close the window.
To copy a header or footer item from an existing item, click the Copy From down arrow to select the item. Then, click Copy.
The Text Block grid displays the header or footer text block. To add a new header or footer text block, click New. To delete a header or footer text block, select the Delete check box, then click Delete.