Maintaining Check Numbers
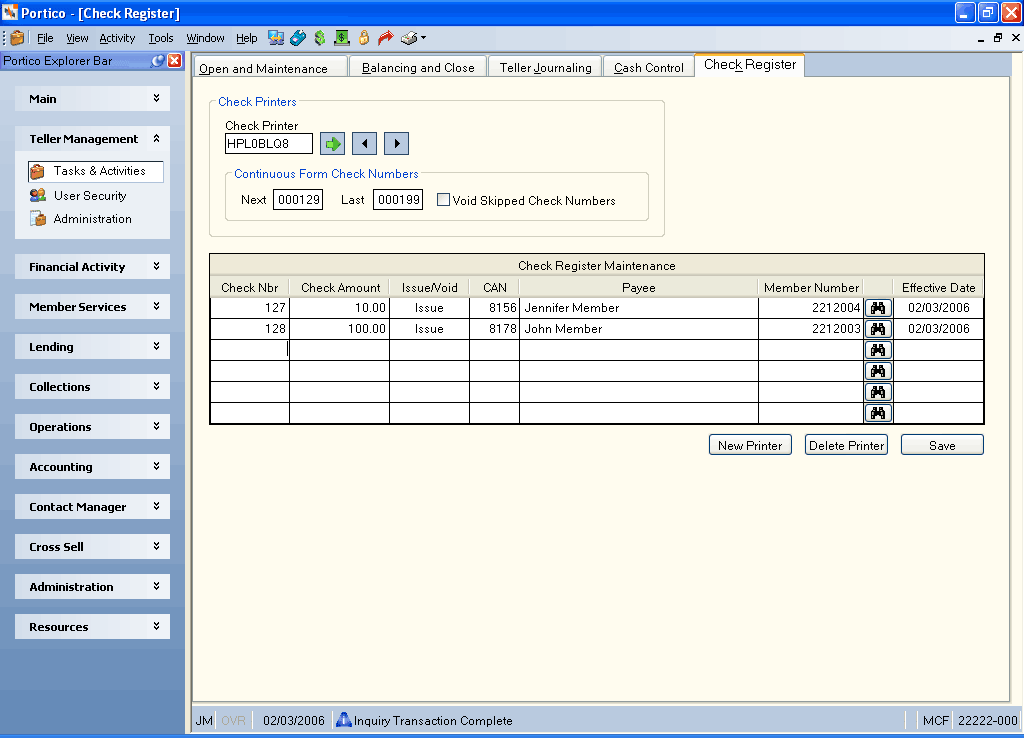
If your credit union does not use Forms Management, the Check Register tab lets you maintain the next available check number for the continuous-form check printer if there is a single check printer, or the beginning and ending check numbers for a range of checks if multiple printers are supported. You also can record off-line check issues and off-line check voids.
To use the Check Register tab, the Check Register check box must be selected in the Products section on the Credit Union Profile - Products & Services tab.
If using the Check Register system, all disbursement transactions indicating a disbursal by check and those entered to reverse a check disbursal transaction require a check number. The system will reject transactions not indicating the check number, and an error message will appear on the screen. In addition to the check number, any check disbursal reversal should include the CAN (computer assigned number) of the related transaction.
To access the Check Register tab, under Teller Management on the Portico Explorer Bar, click Tasks & Activities. The Open tab appears on top. Click the Check Register tab.

How do I? and Field Help
When the Check Register system is first activated, the system displays the network ID for the continuous-form check printer associated with the terminal you are using in the Check Printer field. The network ID is specified on the Print Profile dialog box. You must specify the beginning check number in the Next field(Keyword: CN) and the ending check number in the Last field for the individual printer (Length: 6 numeric). The valid value for the ending check number must be greater than the next check number and less than or equal to 999999. You can adjust the next continuous-form check number by entering the desired number in the Next field on the Check Register tab.
To access the Check Register tab for a different check printer, type the network ID in the Check Printer field and click the green arrow (Length: 8 alphanumeric). You can scroll through the check printers by clicking the left arrow and right arrow. The check printer information is set up at the credit union level; however, you can review the Check Register tab for all the credit union's check printers no matter which branch you are logged into.
If adjusting the continuous-form check number to a higher number, the system can automatically create void transactions for unused check numbers by selecting the Void Skipped Check Numbers check box. The range would include the current check number available up to the new check number that is entered in the Next field. The check register records every check disbursed and voided on the system. You cannot void more than 14 checks at a time. Keyword: MC
In the Check Register Maintenance grid, enter the checks that were issued or voided.
Click Save to save changes to the Check Register tab.
Click New Printer to clear the Check Printer field and access the Check Register tab for a different check printer.
Click Delete Printer to delete the check printer from the Check Register system.
none
- Branch Check Register Summary Report 893
- Check Register Report 900
Portico Host: 847