Creating Standard Messages
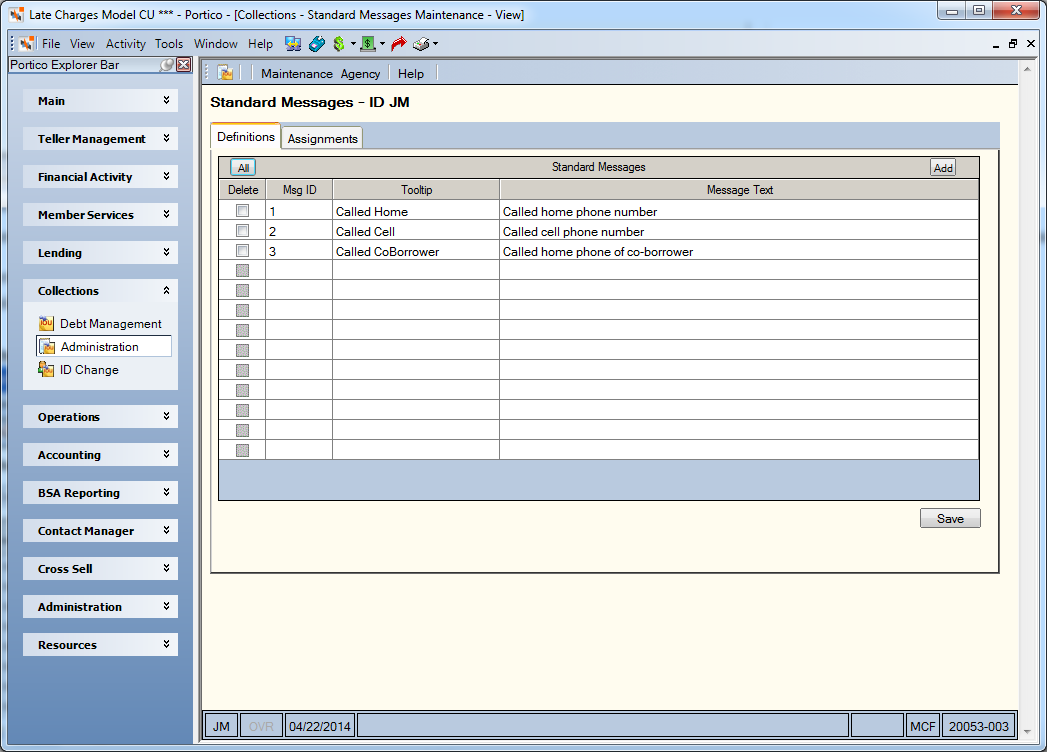
The Standard Messages window lets you add, display, maintain, or delete standard messages used by collection officers in Collections. Each collection officer can have a different set of standard messages. On the Collections – Administration menu bar, select Maintenance, then select Standard Messages to open the Standard Messages window. The Definitions tab will appear on top.

How do I? and Field Help
To add a standard collection message, complete the Msg ID, Tooltip, and Message Text columns. Then, select Save. Select Add to add more rows to the grid on the Definitions tab.
| Column Heading | Description |
|---|---|
|
To delete a message, select the Delete checkbox next to the message you want to delete and select Save. Select the All button to select all the checkboxes. Select the All button again to clear all the checkboxes. |
|
|
Msg ID |
The message identifier (ID) associated with the standard collection message. The identifier is defined by the collection officer and can be any combination of alphanumeric characters Length: 3 alphanumeric Keyword: OM |
|
Tooltip |
The tool tip that will appear when you move your mouse over the button. Length: 30 alphanumeric |
|
Message Text |
The standard collection message. Length: 65 alphanumeric Keyword: OT |
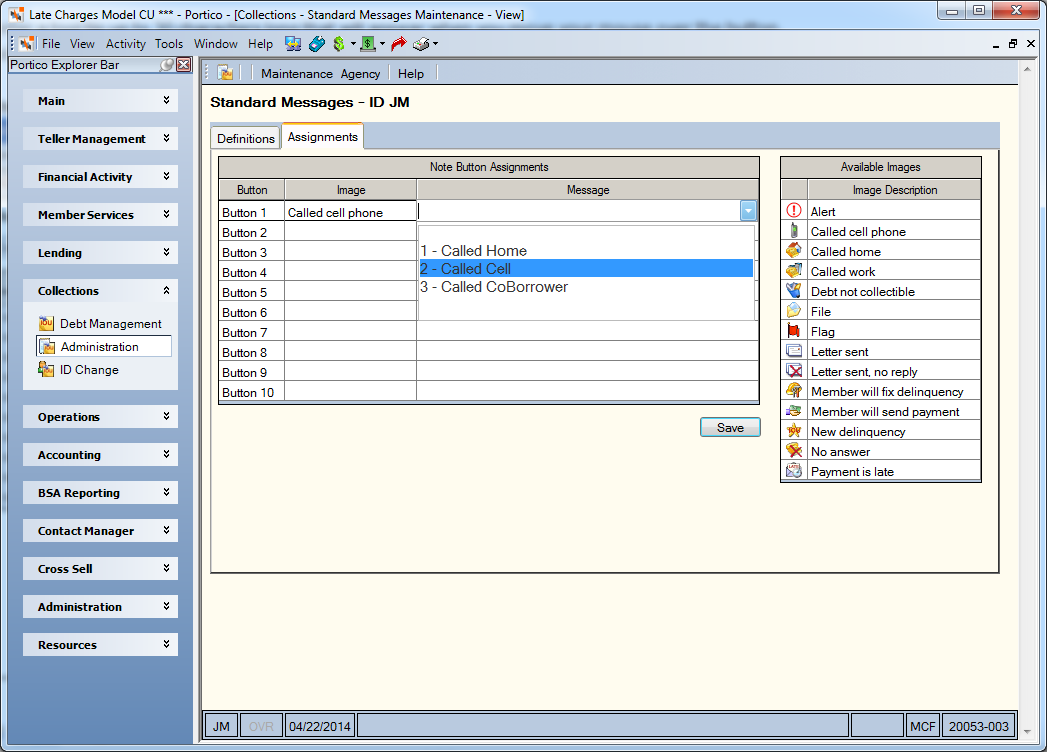
Now select the Assignments tab to assign an icon button to your message.
The Available Images grid displays the images available for use with the standard messages. Select the Image down arrow to select the button image. Then, select the Message down arrow to select the standard message text you entered on the Definitions tab. Then, select Save.
| Column Heading | Description |
|---|---|
|
Button |
The order of the buttons that will appear on the Notes subtab. |
|
Image |
Select the Image down arrow to select the button image. |
|
Message |
Select the Message down arrow to select the standard message text. |
Portico Host: 626