Optional Withdrawal Information
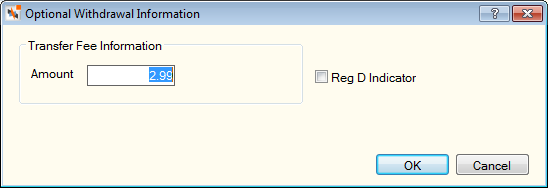
On the Transactions - Share and Loan Transfers tab, click the button in the Fee/Lt Chg column or the ellipsis button to display the Optional Withdrawal Information dialog box and specify a fee amount or change any of the transfer options.


How do I? and Field Help
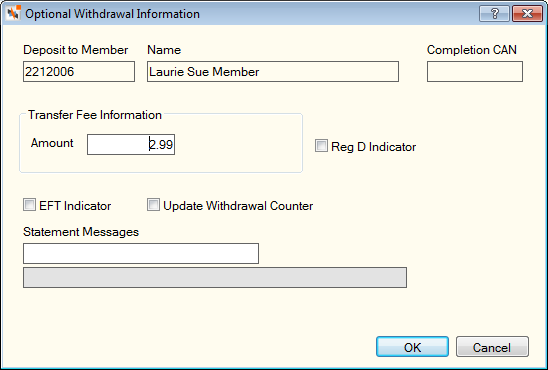
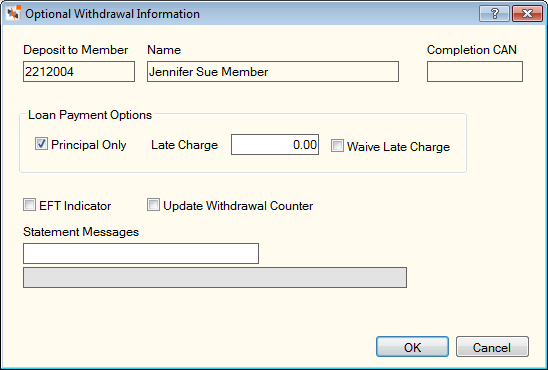
The member number and name of the member that will receive the funds will appear at the top of the Optional Withdrawal Information dialog box when you click the ellipsis button. The Completion CAN field indicates the computer-assigned number (CAN) of the transaction.
In the Transfer Fee Information group box, specify a fee amount in the Amount field (Length: 10 numeric/Keyword: FA). If a fee amount is entered, a valid general ledger number must be entered in the GL field (Length: 6 numeric/Keyword: FG). The fee description is defined on the Product Code Information window.
Select the Reg D Indicator check box to increment the share account's Regulation D transaction counter (Keyword: RD). The number of transactions is stored in the Period-to-Date Reg D Txns field on the Shares - Activity tab. If the share account's Period-to-Date Reg D Txns field on the Shares - Activity tab is greater than the limit defined in the Reg D Transactions field on the Share Profiles - Account Information tab, you must enter a teller override to complete the transaction.
Select the EFT Indicator check box if this is an EFT transaction (Keyword: ET). The system will automatically select the Force at Month End Because of EFT/Misc Activity check box on the Stmts/Reporting/Notices tab. If the EFT Indicator check box is selected, you must type a statement message in the Statement Messages 1 field.
Select the Update Withdrawal Counter check box to increment the share account's withdrawal counter (Keyword: WD). The number of withdrawals is stored in the Period-to-Date Withdrawals field on the Shares - Activity tab.
To override the default Federal and State withholding amounts, select the Override Withholding check box and enter the withholding amounts.
- In the Federal field, enter the amount of Federal withholding that will be subtracted from the IRA transaction amount. This amount is automatically calculated if the Calculate Federal check box is selected on the tab. Length: 8 numeric including decimal/Keyword: WH
- In the State field, enter the amount of state withholding that is subtracted from the IRA transaction amount. This amount is automatically calculated if the Calculate State field on the Credit Union Profile - Shares tab is greater than 0.00 or you may manually enter the amount. Length: 8 numeric including decimal/Keyword: SW
- Portico will calculate the total amount of State and Federal withholding that will be subtracted from the IRA transaction amount.
- In the IRA Non-Tax Amount field, enter the amount of the transaction that is considered non-taxable if the account is an IRA (Length: 12 numeric including decimal).
- In the Excess Earnings field, enter the amount of the IRA distribution that is excess earnings. Excess earnings is the dividend amounts earned on excess contributions during a given tax year. This amount is taxable. Keyword: EA / Length: 12 numeric including decimal. Enter an amount in this field only if you are using one of the following IRA distribution codes: Removal of excess contributions for same year (Traditional - 8, 81 (with exception); Roth - 8J; Coverdell - 8M) or Removal of excess contributions for prior year (Traditional - P, P1 (With exception); Roth - PJ; Coverdell - PM).
If desired, enter a statement message in the Statement Messages fields. If the EFT Indicator check box is selected, you must type a statement message in the Statement Messages 1 field. The first statement message line must be entered before the second line can be used. The Statement Message fields will apply to all withdrawals and deposits listed in the Transaction Area grid. (Statement Message 1 Length: 35 alphanumeric/Keyword: SM | Statement Message 2 Length: 44 alphanumeric/Keyword: M2)
The JV Message Format field in the Statement Options section on the Credit Union Profile – Member tab determines the default statement message.
- If the JV Message Format field is N - Not supported, the statement message will be JOURNAL VOUCHER.
- If the JV Message Format field is Y - Formatted, the statement message will be the message you manually entered. If you leave the Statement Message fields blank, the statement message will be SCR XXX MEM #######, where XXX is the host transaction code and ###### is the member number (e.g. SCR 269 MEM 2212004).
- If the JV Message Format field is E - Unformatted, the statement message will be the message you manually entered. If you leave the Statement Message fields blank, the statement message will be blank.
Note: If the Level field in the Teller Administration section on the Credit Union Profile - Teller tab specifies 1 or 3, the JV Message Format field must be Y or E.
For a share deposit adjustment, you can specify one of the following values in the Statement Message field and the associated message will appear on the member's statement and in financial history.
0 - OVERDRAFT CHARGE
1 - DRAFT PURCHASE
2 - STOP PAY FEE
3 - DRAFT COPY FEE
If you use a journal voucher transaction to correct a dividend amount, the following message is recommended: DIVIDEND ADJUSTMENT FOR MM-DD-YY where MM-DD-YY is the effective date of the transaction.
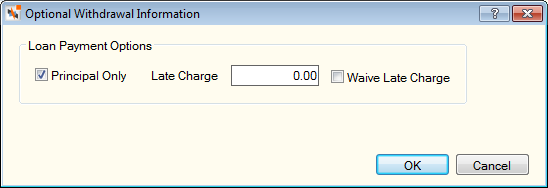
The Late Charge field displays the late charge that will assessed on the loan (Length: 8 numeric/Keyword: LC). The late charge is automatically calculated based on options specified on the Loan Profiles window. If the Exclude from Late Charges check box is selected on the Loans - General tab, the system will not calculate a late charge for the member. Select the Waive Late Charge check box to waive the late charges due on the loan.
Select the Principal Only check box to make principal-only payments to a loan (Keyword: PA). This option cannot be used when a late charge is assessed. The principal only payment cannot be used with student loans or residual loans (unless allowed on the Loan Profiles window).
Click OK to save your changes and close the dialog box. Click Cancel to close the dialog box without saving your changes.