Uploading Images
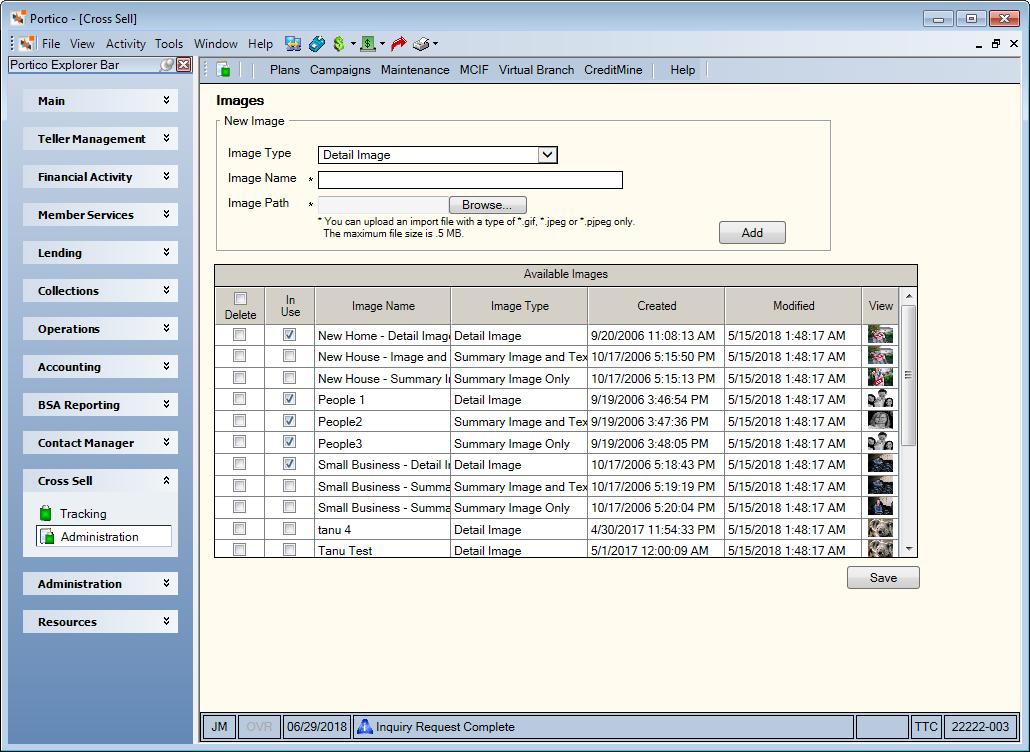
The Images window lets you upload credit union-defined images that you can select from when setting up your cross sell plan. To open the Images window, under Cross Sell on the Portico Explorer Bar, click Administration. On the Administration top menu bar, click Virtual Branch, then click Images.

How do I? and Field Help
To add a new image, click the Image Type down arrow to select the type of image. Then, enter the name of the image in the Image Name field (Length: 100 alphanumeric. Click Browse to locate the image on your hard drive or credit union LAN. The supported image files are .gif or .jpg. Then, click Add to add the image to the list.
| Column Heading | Description |
|---|---|
|
Delete |
To delete an image, select the Delete check box. Then, click Save. |
|
In Use |
Select the In Use check box to indicate that the image is currently being used in the Virtual Branch opportunity. |
|
Image Name |
The credit union-defined name of the image. Length: 100 alphanumeric |
|
Image Type |
The type of image. The valid values are: Detail Image, Summary Image and Text, Summary Image Only, Digital Momentum Detail Image, Digital Momentum Summary Image and Text, or Digital Momentum Summary Image Only. |
|
Created |
The date and time the image was created. |
|
Modified |
The date and time the image was modified. |
|
View |
Click the image thumbnail to view the image. |
Fiserv recommends the following image sizes:
- Detail Image – 150 pixels wide by 175 pixels high
- Summary Image and Text – 60 pixels wide by 75 pixels high
- Summary Image Only – 140 pixels wide by 75 pixels high
- Digital Momentum Detail Image – 150 pixels wide by 175 pixels high
- Digital Momentum Summary Image and Text – 189 pixels wide by 98 pixels high
- Digital Momentum Summary Image Only – 378 pixels wide by 98 pixels high