Creating a Cross Sell Plan or Special Offer
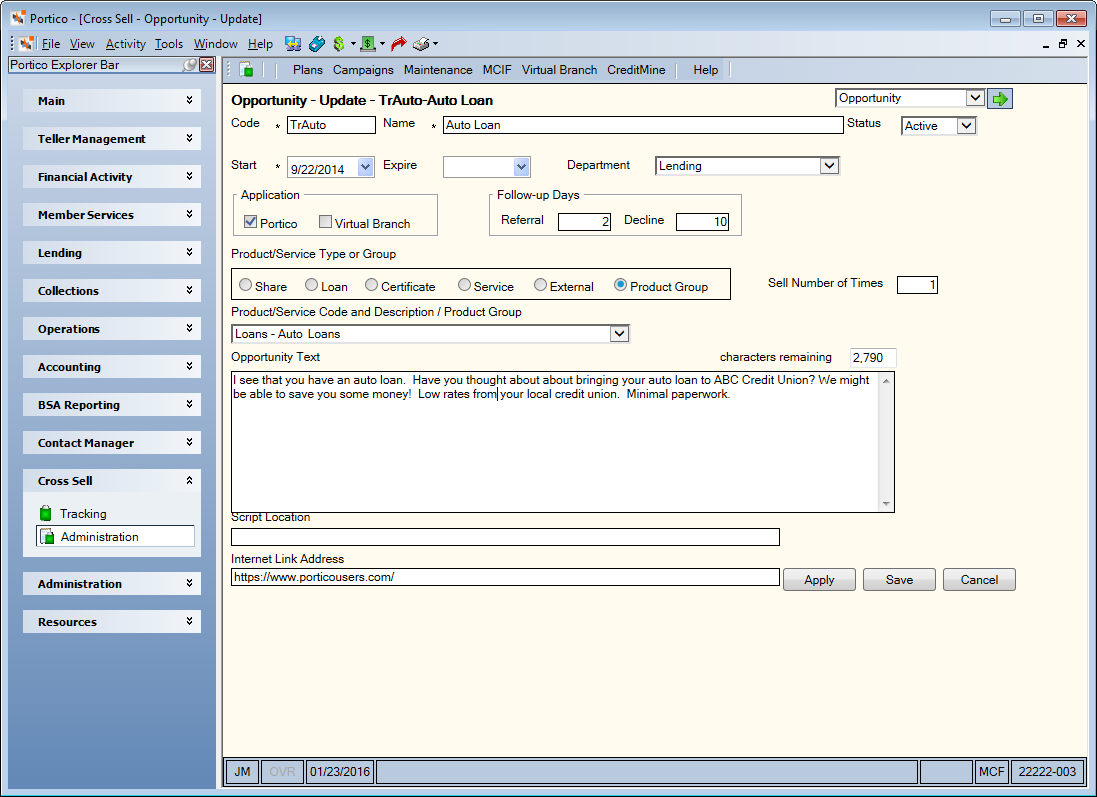
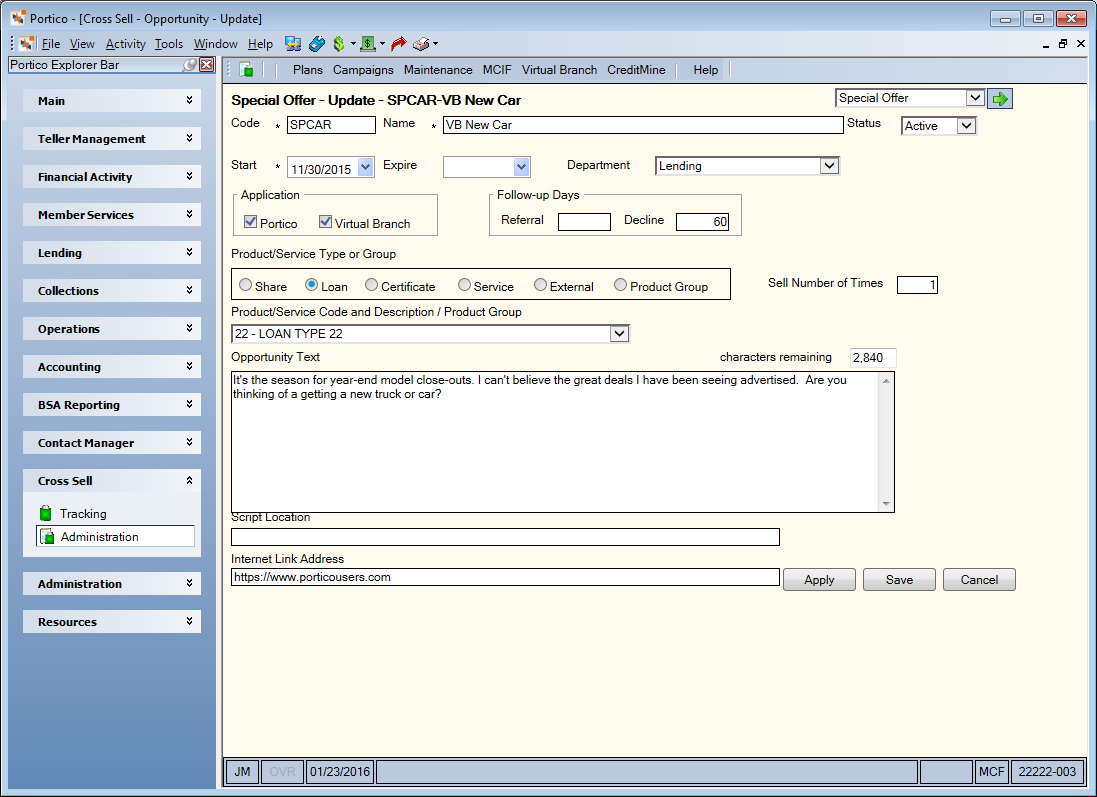
The Opportunity - New/Update window lets you set up or modify targeted cross sell plans. The Special Offer - New/Update window lets you set up or modify special offer plans.
To open the Opportunity - New/Update window or Special Offer - New/Update window, under Cross Sell on the Portico Explorer Bar, click Administration. On the Administration top menu bar, click Plans, point to Cross Sell Plans.
- Click Targeted to access the Cross Sell Plan - List window.
- Click Special Offers to access the Special Offer Plan - List window.
To add a new plan, click New. To create a new plan by copying an existing plan, select the plan you wish to copy from the list. Then, click Copy. To modify an existing plan, click the name of the plan.


How do I? and Field Help
Complete the following steps to set up a cross sell plan:
- In the Code field, enter a unique credit union-defined code to identify the plan (Length: 7 alphanumeric). Required field.
- In the Name field, enter the credit union-defined name of the plan (Length: 40 alphanumeric).
- Click the Status down arrow to select the status of the plan. For targeted cross sell plans, you can choose from: Active, Inactive, or Test. System default is Test. A cross sell plan with a status of Test cannot be sold. For special offer cross sell plans, you can choose from: Active or Inactive. System default is Inactive. A special offer plan with a status of Inactive cannot be sold.
- Click the Start down arrow to select the start date for the plan from the calendar or enter the date in MM/DD/YYYY format. For new plans, the system default is today's date. Plans can be effective dated into the future for promotions beginning on a certain date.
- Click the Expire down arrow to select the end date for the plan from the calendar or enter the date in MM/DD/YYYY format. After the expiration date is reached, the opportunity will no longer appear on the Cross Sell Opportunities window regardless if the Status field is Active. If left blank, the plan will appear on the Cross Sell Opportunities window as long as the Status field is Active.
- Click the Department down arrow to select a default department that will send all referrals tied with a plan to the department’s Assignments Queue window.
- The Application group box indicates the application in which the opportunity will appear. Portico indicates that the opportunity will appear on the Opportunities dialog box. If your credit union wishes to display the opportunity on your Virtual Branch Online Banking web site, select the Virtual Branch check box in the Application group box.
- In the Follow-up Days group box, enter the default number of days that will be used to calculate the follow-up date on the Referral - New dialog box (Length: 3 numeric). The date is calculated using the Processing Schedule window to exclude any days that the credit union is closed. To include Saturday and/or Sunday in the date calculation, select the Saturday and/or Sunday check boxes in the Escalation and Follow-up Processing group box on the Processing Schedule window.
- In the Decline field, enter the enter the number of days before an opportunity that a member Declined with Follow-up will reappear on the Opportunities dialog box (Length: 3 numeric). For example, if the Decline field is 60 and the opportunity status is Decline with Follow-up, the opportunity will reappear on the Opportunities dialog box after 60 days. If the opportunity status is Referred, Sold, Decline, or Decline with Interest, the opportunity will not reappear on the Opportunities dialog box. If left blank, the opportunity will never reappear on the Opportunities dialog box unless the original member cross sell history is purged. The date is calculated using the Processing Schedule window to exclude any days that the credit union are closed.
- In the Product/Service Type or Group group box...
- Click the Share option if the product offered in the plan is a share product.
- Click the Loan option if the product offered in the plan is a loan product.
- Click the Certificate option if the product offered in the plan is a certificate product.
- Click the Service option if a service will be offered in the plan.
- Click the External option if the product or service offered in the plan is an external product or service.
- Click the Product Group option to set up a cross sell plan for a product group (e.g. IRAs), instead of an individual product or service (e.g. share type 12).
- In the Sell Number of Times field, enter the number of times the product or service can be sold to a member after the member has already been sold the product or service (Length: 3 numeric). If the Sell Number of Times field is greater than 1, Cross Sell will present the product or service on the Opportunities dialog box again. If the opportunity is a share type, the Sell Number of Times field should be 1 since members cannot have two of the same share type.
- Click the Product/Service Code and Description / Product Group down arrow to select the product, service, or product group that will be offered in the plan. The drop-down list will change depending on the Product/Service Type or Group option selected. The product, service, or product group selected will appear on the Cross Sell Opportunities window. Product/Service codes and descriptions are predefined on the Administration – Customization – Lists – Products and Services.
- In the Opportunity Text box, enter additional information that can assist the employee in referring or selling the product or service to the member (Length: 3,000 alphanumeric). The number of characters available appear in the characters remaining field.
- If you have a specific script file that can assist the employee in referring or selling the product or service to the member, enter the directory location of the file in the Script Location field (Length: 128 alphanumeric).
- If you have specific Internet address that can assist the employee in referring or selling the product or service to the member, enter the fully qualified URL in the Internet Link Address field (Length: 128 alphanumeric).
- Click Apply to apply the plan settings. Portico will review the information for errors. If no errors are found, Portico will save the plan settings. If errors are found, an error message will appear prompting you to correct the necessary fields.
- Click Save to save the plan and close the window. Portico will review the information for errors. If no errors are found, Portico will save the plan and close the window. If errors are found, an error message will appear prompting you to correct the necessary fields.
Use the navigation drop-down list in the upper right corner of the window to transfer to other Cross Sell Plan windows and set up additional plan options. Click Cancel to close the window without saving the plan.