Using IMMeSign
Let's begin on the Portico Document Preparation dialog box.
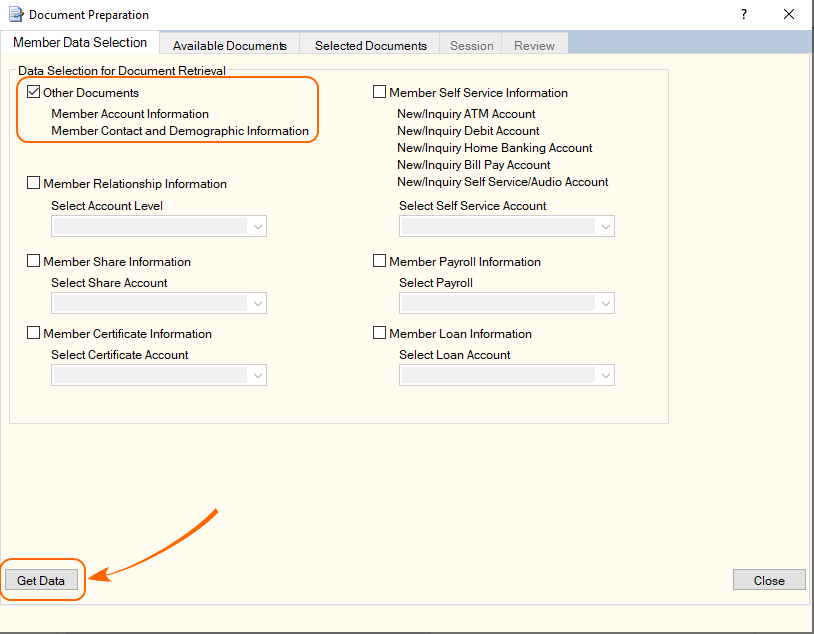
- On the Member Data Selection tab, select the Other Documents checkbox and select Get Data. Portico displays the list of documents on the Available Documents tab.
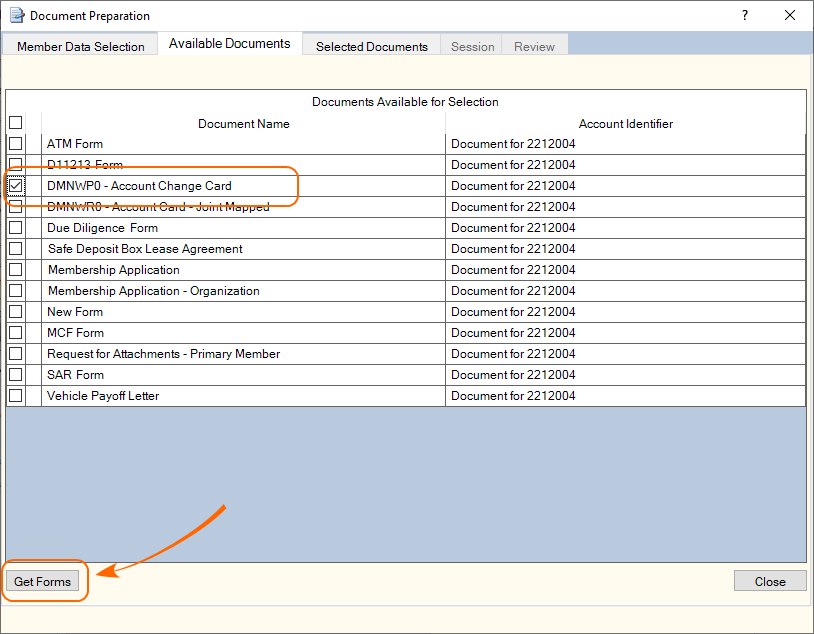
- On the Available Documents tab, select the checkbox next to the desired document(s), and then select Get Forms.
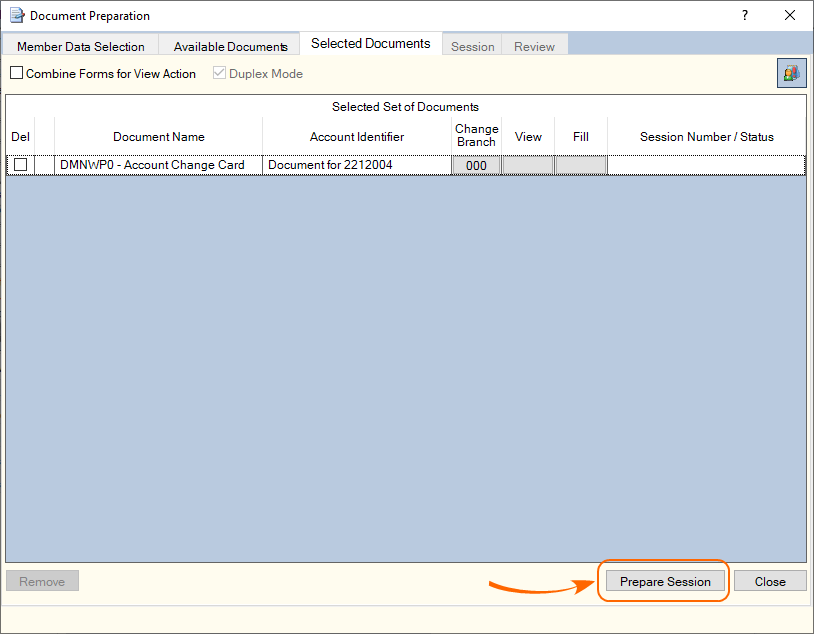
- On the Selected Documents tab, you can change the branch, view the document, and fill in the document. Select Prepare Session to prepare the signing session.
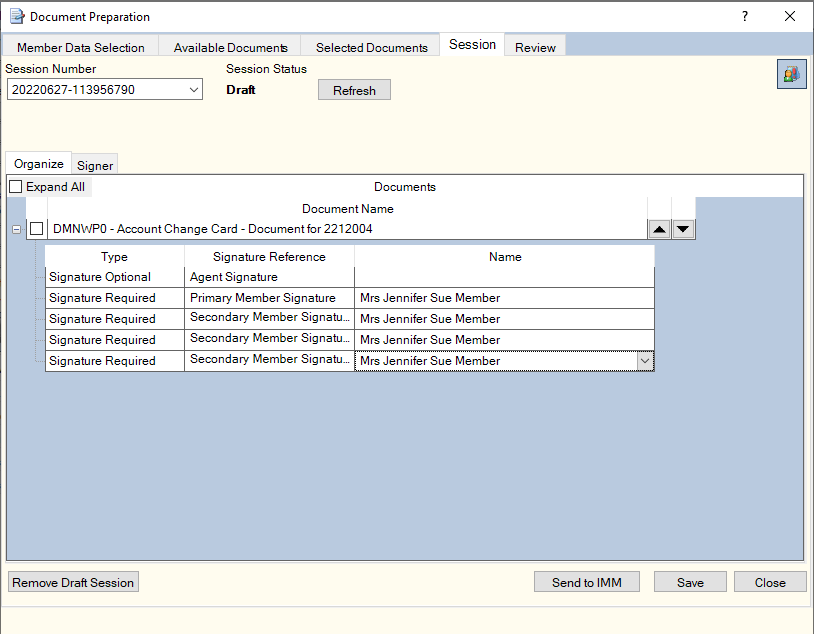
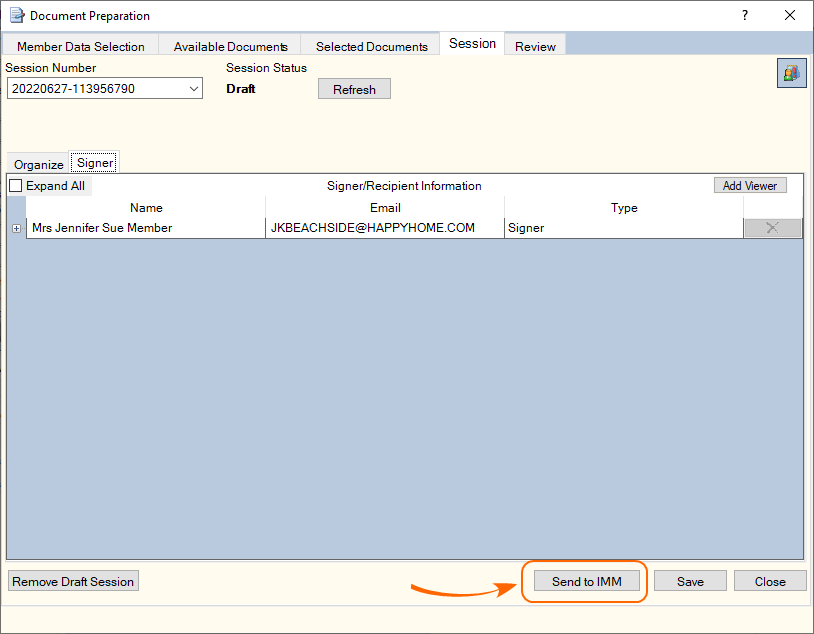
- On the Session tab, use the drop-down list on the Organize tab to designate a signer for a specific field on a document. Select Remove Draft Session to remove a draft signing session.
- The email address of the recipient from the Contact Information tab appears on the Signer tab or you can enter a different email address. Select Add Viewer to include a recipient as a view-only receiver of the selected documents.
- Select Send to IMM to transmit the document(s) to the IMM interface for in-branch or remote signing. The IMM eSign Session Details page appears.
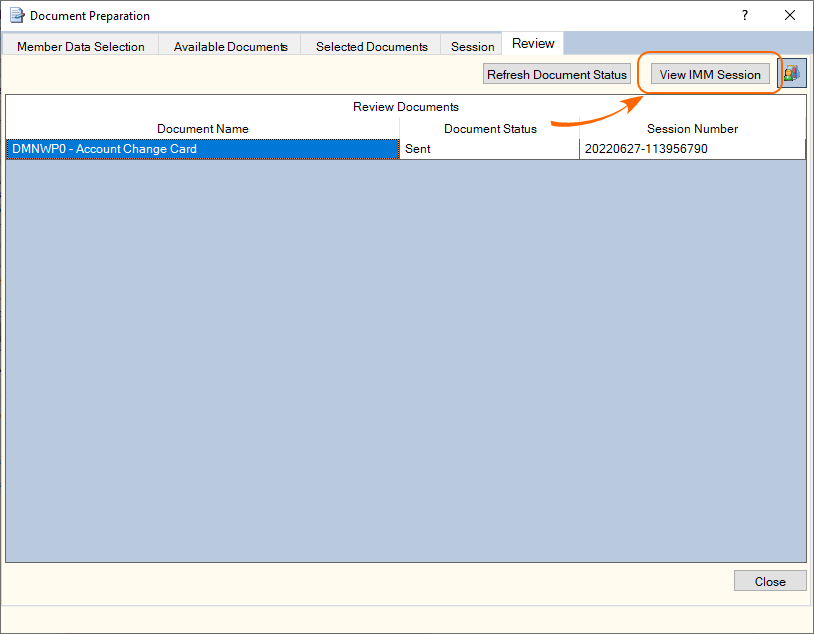
The Review tab displays a document status of Sent. Select View IMM Session to display the IMM eSign Session Details page.
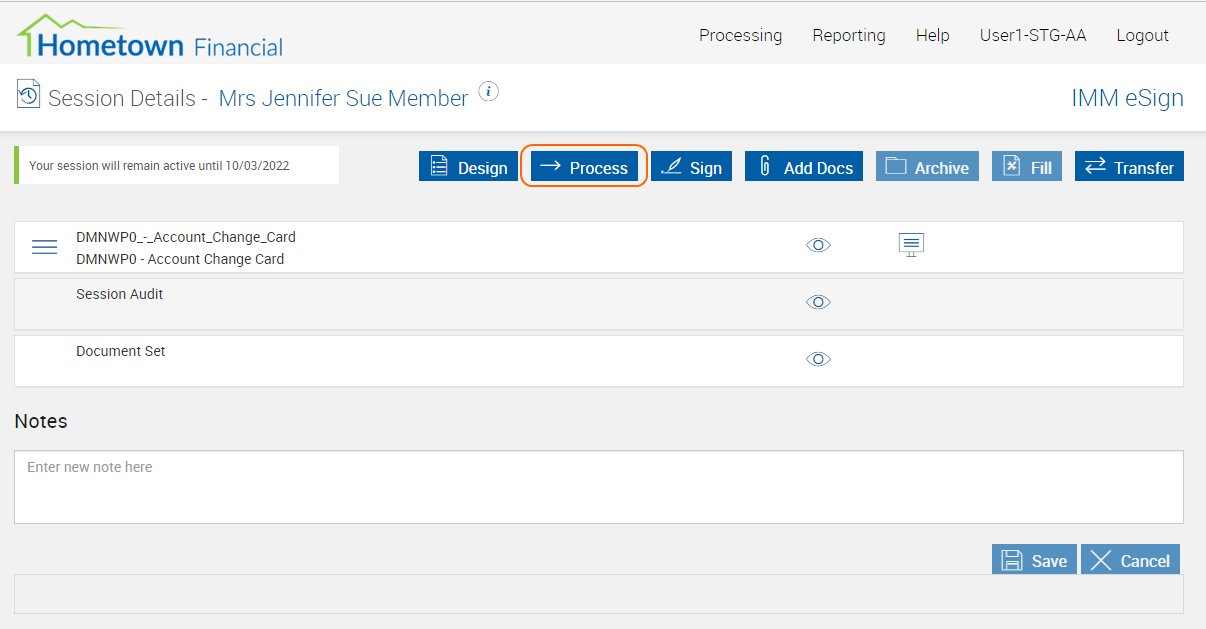
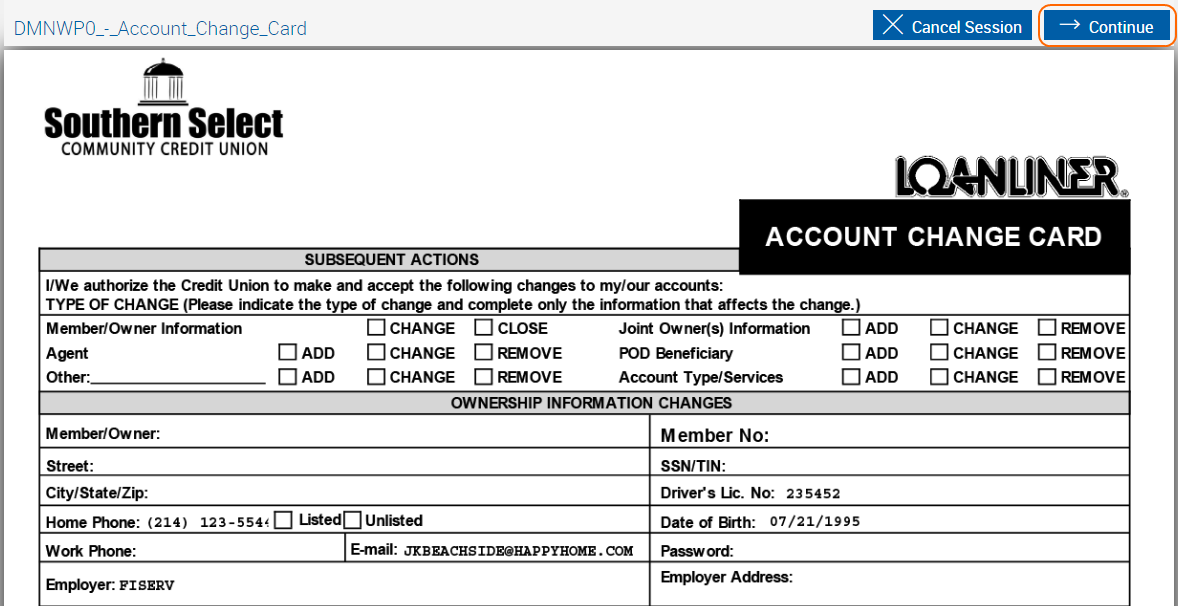
- On the IMM eSign Session Details page, select Process to view the document.
- Select Continue to return to the IMM eSign Session Details page.
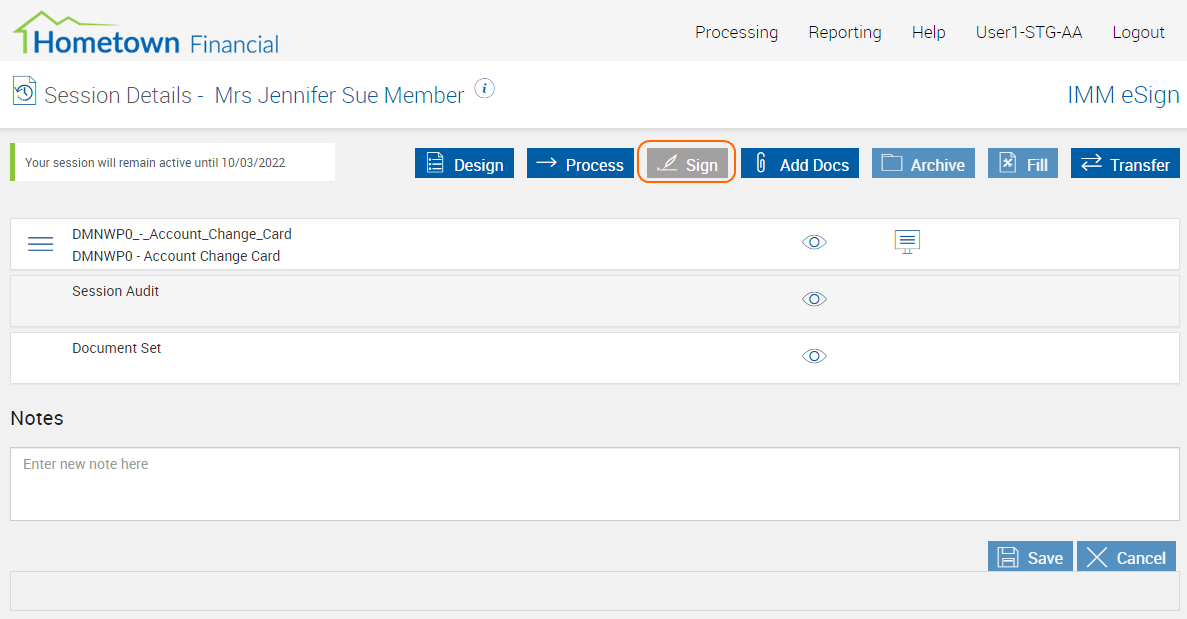
- On the IMM eSign Session Details page, select Sign to display the eSignature Management page.
- From the eSignature Management page, you can have the member sign the documents immediately at your credit union branch or select the envelope icon to email the documents to the member for signing. In this example, let's select Sign to begin the in-branch signing process.
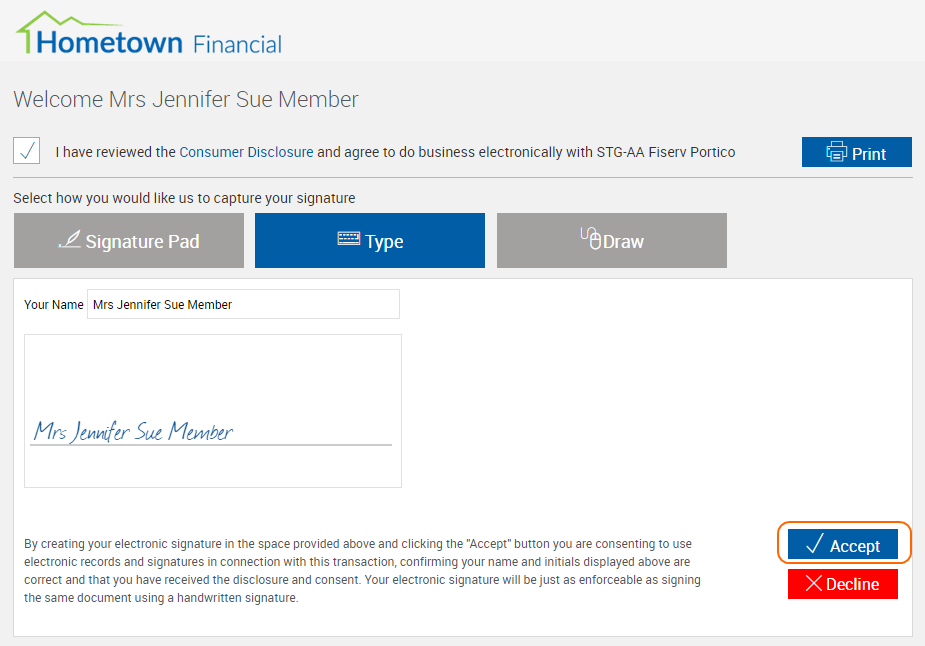
- With IMMeSign, you can capture a signature using a signature pad or the member can type or draw a signature. Select Accept to accept the signature and begin signing the document.
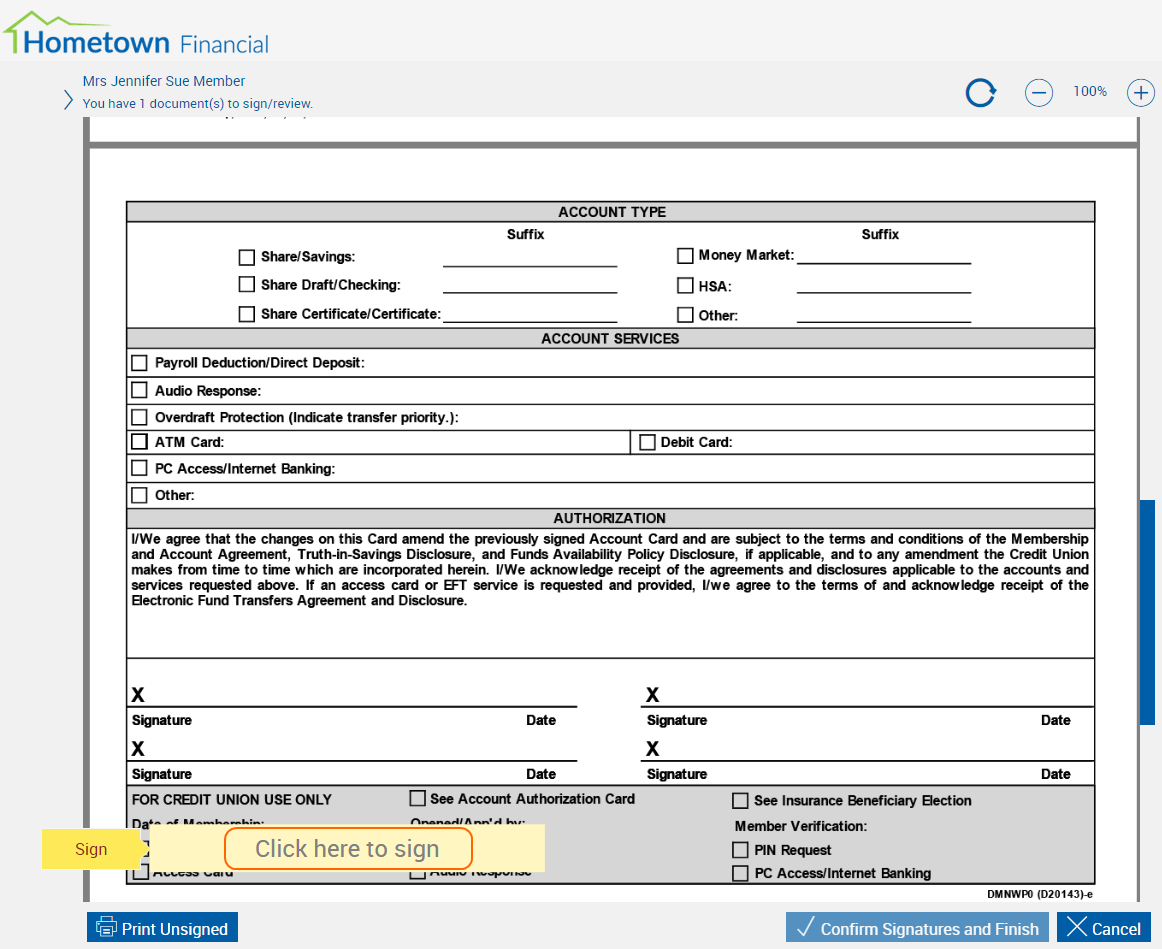
- On the document, use select here to sign to add a signature to the document. Then, select Next to move to the next area in the document that requires a signature.
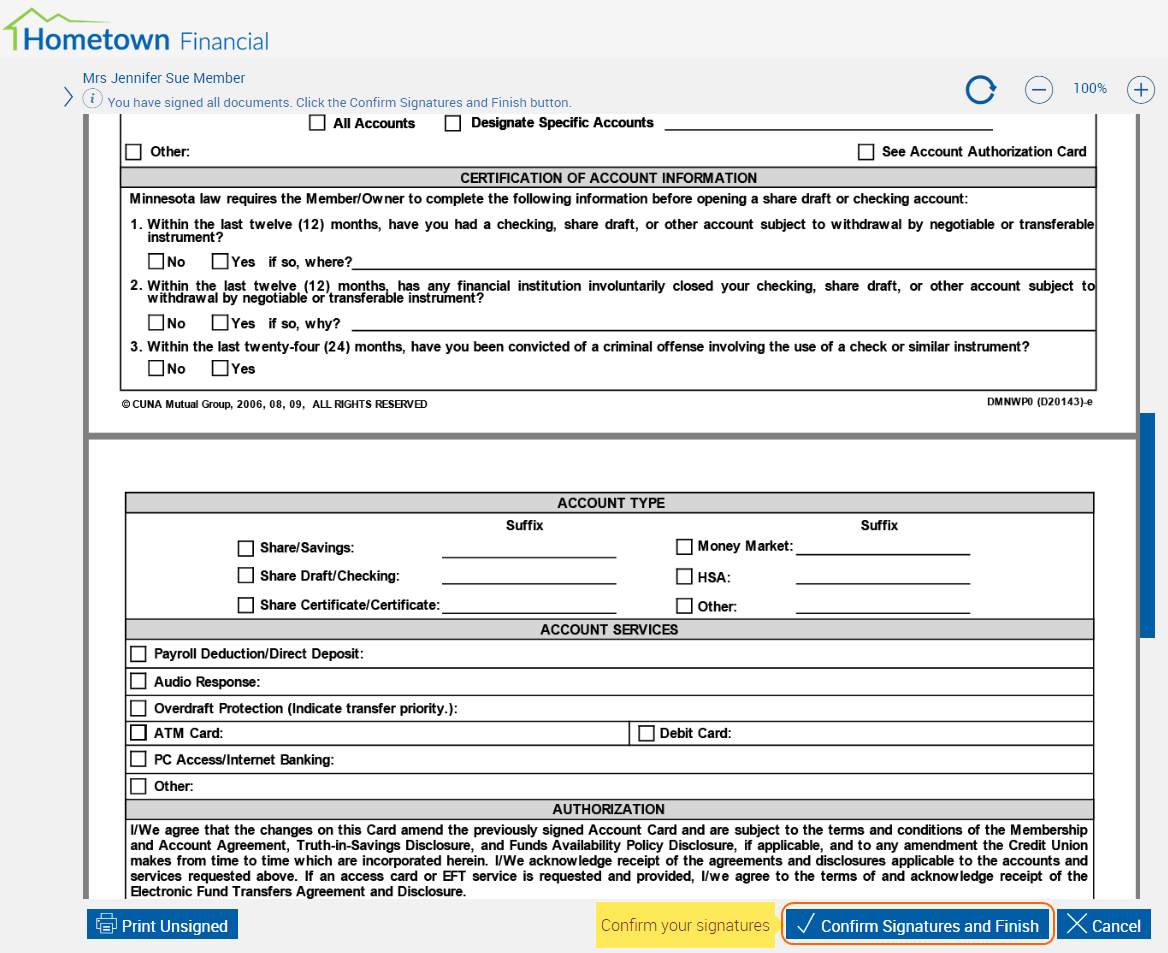
- After IMMeSign adds the last signature to the document, select Confirm Signatures and Finish to return to the eSignature Management page.
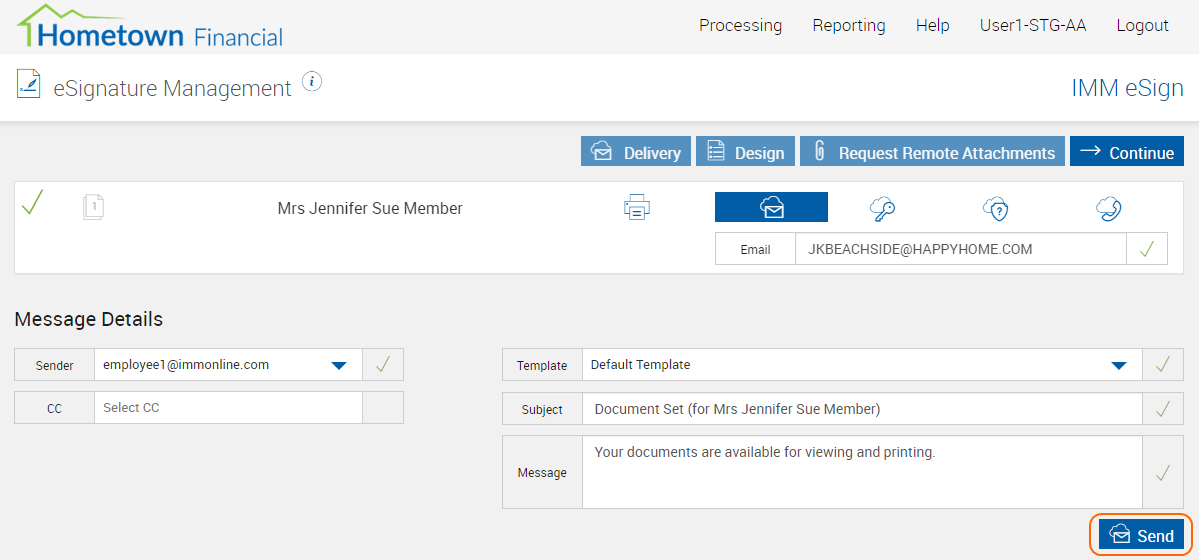
- On the eSignature Management page, select Delivery to send the documents to the member's email address.
- Enter the member's email address, select an email template, and enter a custom message for the credit union member. Then, select Send.
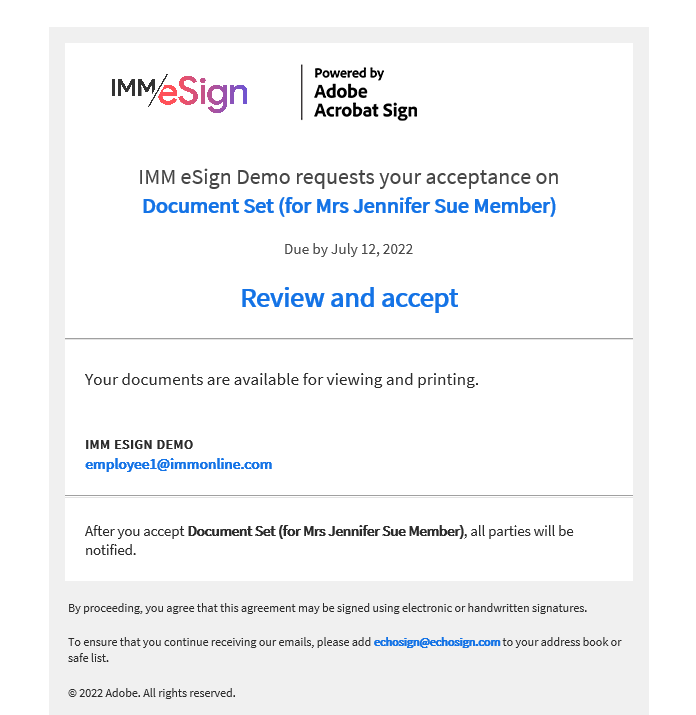
- IMMeSign sends an email to the member allowing them to select a link to display the documents on the IMM eSign website.
In IMMeSign, the Session Details page appears.

In Portico, the session status indicates that documents are signed.


Ad hoc documents and unfinished document sets from IMMeSign are available on My Queue. To view the Document Preparation dialog box for these documents, select the envelope icon.
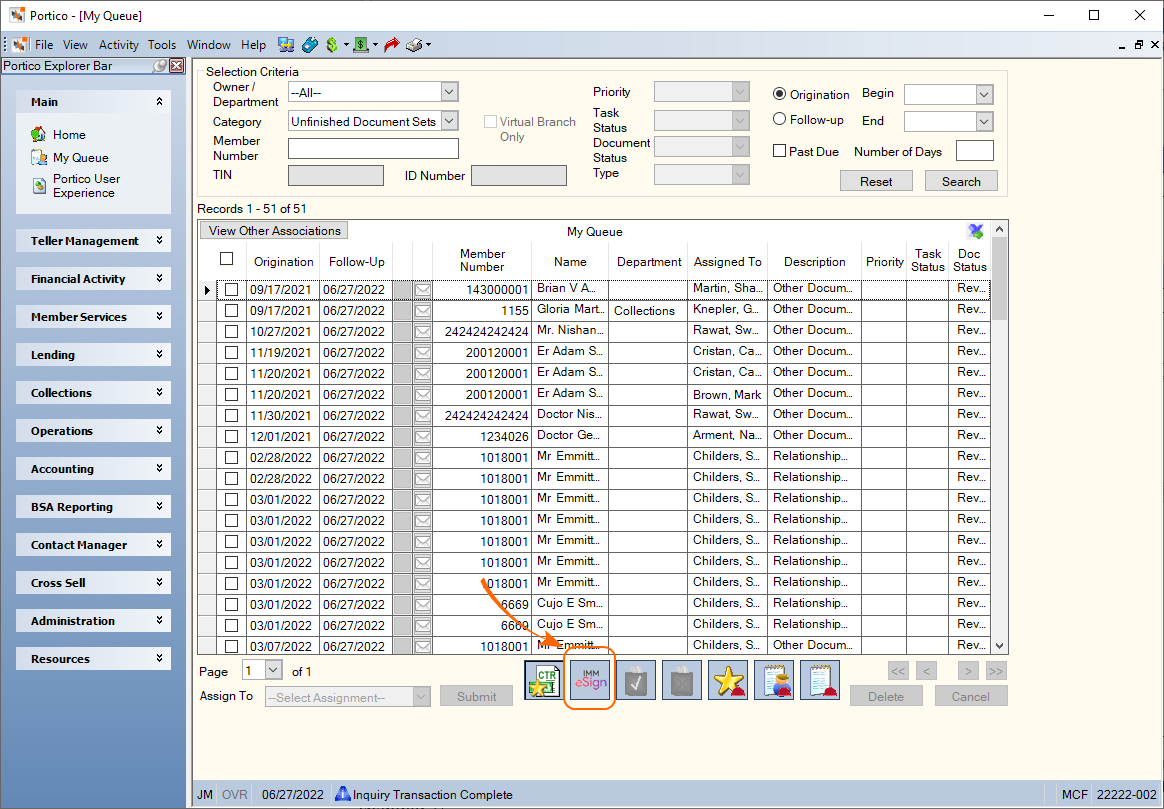
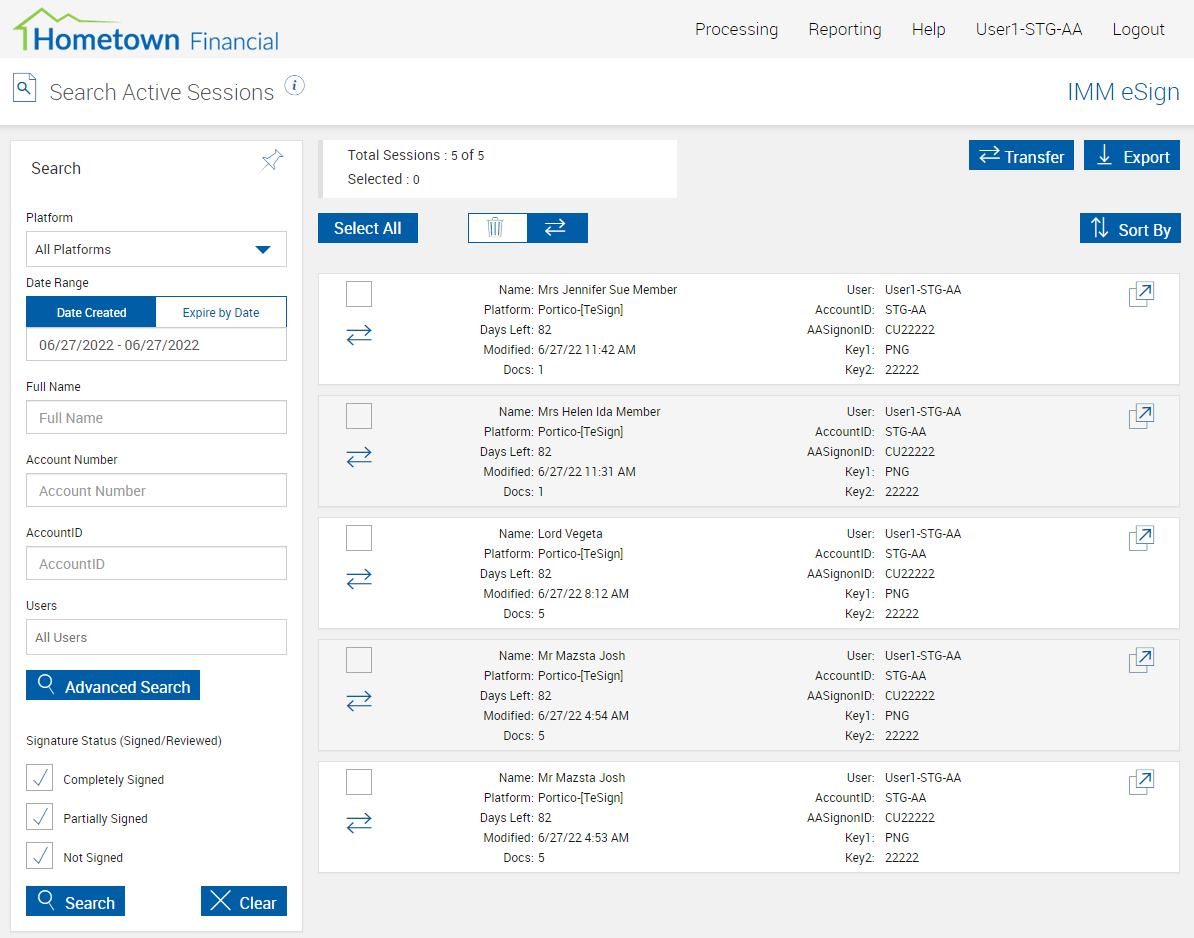
Select the IMMeSign icon button to display the Search Active Sessions page.
