Entering Checks in the Check Log
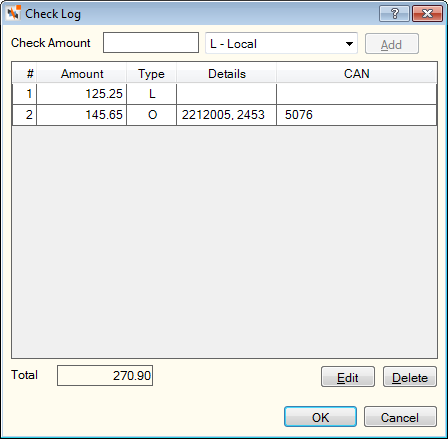
The Check Log dialog box lets you enter checks received and define a hold code for each check. The Check Log dialog box will pop up automatically when the cursor is in the Amount column for CR Checks Received. You can also access the Check Log dialog box by clicking the CL button in the transaction area grid. You can activate the Check Log dialog box on the User Profile – Popups tab.

How do I? and Field Help
Complete the following steps to add a check on the Check Log dialog box.
- In the Check field, enter the amount of the check received. Length: 9 numeric
- Click the down arrow to select the hold type. The valid options are:
- I - Immediate
- L - Local
- E - Exception (Not valid for Shared Service Center.)
- O - On-Us (Not valid for Shared Service Center.)
- C - On-Us (Hold Funds Only. Not valid for Shared Service Center.)
- P - Payroll (Valid for Shared Service Center only.)
- Click Add or press + on the keyboard to add the check to grid.
- The Total field displays the total amount of the checks listed in the check log.
The Check Log grid contains the check number, amount, type, details, and associated CAN of check received.
| Column Heading | Description |
|---|---|
|
# |
The order number of the check. |
|
Amount |
The amount of the check. |
|
Type |
The type of check hold.
|
|
Details |
The additional check details, such as the share draft ID and serial number for an on-us check. |
|
CAN |
The CAN associated with the check. |
When all of the checks have been entered, press ENTER or click OK.
To change a check, select the check in the grid, then click Edit.
To delete a check, select the check in the grid, then click Delete.
Click Cancel to close the Check Log dialog box without saving the checks listed.
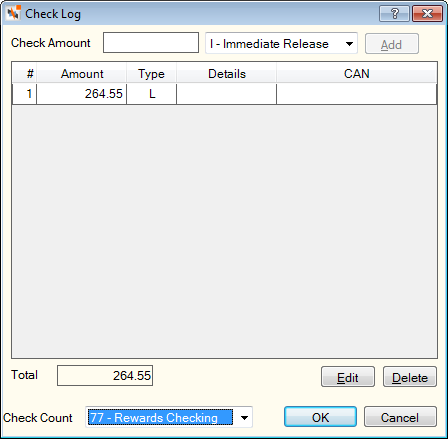
If the Deposited Items Count check box is selected on the Credit Union Profile - Teller tab and the member has more than one of the share draft types specified in the Include Share Draft Types fields on the Credit Union Profile - Teller tab, a Check Count drop-down list will appear on the Check Log dialog box. Click the Check Count down arrow to select the share draft type used to track deposited item counts. The deposited check will be recorded automatically in the Local, On-us and Exception counters on the Shares – Activity tab. Immediate release checks are counted with local hold checks to update the Local counter on the Shares – Activity tab. A Flexible Fee program may be created to consolidate the counters for Local, Exceptions and On-Us deposited items and charge a fee in excess of credit union-defined parameters. This is a common practice for small business accounts and does not require the credit union to use Account Analysis to automate the count of the deposited items. The Check Count drop-down list will not appear if the member has Account Analysis.

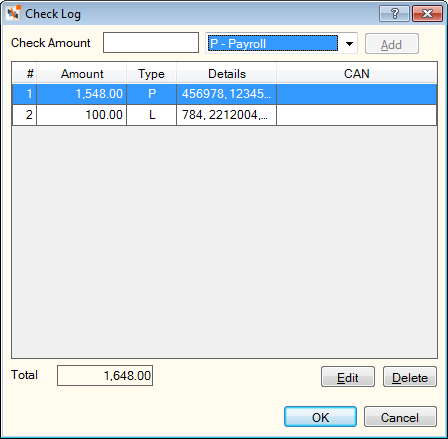
Within Shared Service Center, the check hold options are immediate, local, and payroll. To identify payroll-related deposits, select the Payroll option. For Portico issuer credit unions, these checks will be treated as no-hold items. For non-Portico issuers, the hold days and amounts for payroll check deposits may be included in the issuer response. Check hold information is not printed on receipts generated by the Portico acquirer platform. Payroll check deposits will be recorded on the Checks Received Journal dialog box for acquirer credit unions.

The CO-OP shared branching network limits the number of payroll checks to 5 checks per transaction. For Portico acquirers, the system will not restrict you from entering more than 5 payroll checks. For Portico issuers, the system will not verify the number of payroll checks and will process the deposit transaction without error. There is the potential that a non-Portico issuer will not accept more than 5 payroll deposits in a single transaction. In this scenario, the teller will need to perform multiple transactions to deposit the checks.
Portico provides integrated access to check scanning through IMM Teller Item Capture. Checks are automatically added to the Check21 cash letter for the credit union. Plus, details from scanned checks populate the Portico Check Log, reducing data entry errors.
When completing a transaction involving checks received, the Check Log dialog box will automatically appear. You can scan the checks immediately or you can scan them later during the day.
A user can open the Check Log dialog box from the Financial Transactions screen when receiving checks. Select the CL icon to open the Check Log dialog box.
To scan the checks immediately, you can click the Scan button or press / on the keyboard to launch the IMM Teller Item Capture application. If your credit union uses physical deposit slips, you must scan the deposit slip first, before scanning the checks. IMM Teller Item Capture also provides virtual deposit slips, so a physical deposit slip is not needed. There is no limit to the number of checks you can scan into the Check Log so you can easily scan large stacks of checks.
If you manually add checks then click Scan, the scanned check information will override any manually entered information in the Check Log.
On the IMM Teller Capture screen, click Scan. IMM Teller Item Capture will scan the checks, reading both the CAR amount (the amount of the check written in numbers) and the LAR amount (the amount written in words). When all the checks have been scanned, verify the check amounts and enter the total deposit amount in the Amount field for the deposit slip. When the transaction is Balanced, click Done.
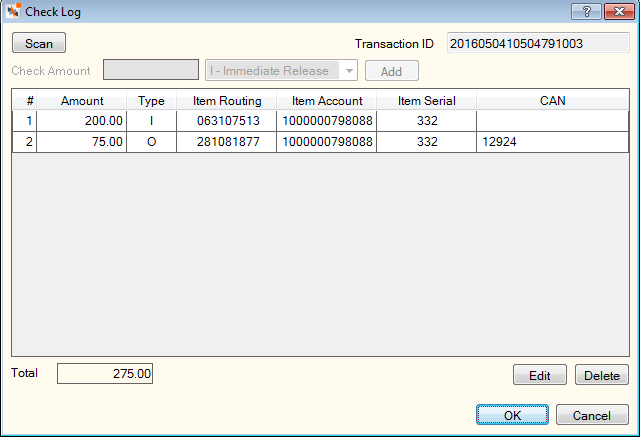
The Portico Check Log dialog box will display the scanned check details from IMM Teller Item Capture.

The Transaction ID field displays a unique reference ID based on the year, month, day, hour, minute, second, millisecond, and branch number. For example, 2016010715272206003 indicates that the checks were scanned on January 7, 2016 at 3:27:22:06PM at branch 003. The transaction ID is used to identify the scanned checks in IMM Teller Item Capture.
| Column Heading | Description |
|---|---|
|
Item Routing |
The 9 digit item routing number. |
|
Item Account |
The 18 digit item account number. |
|
Item Serial |
The 6 digit serial number on the check. |
Click OK to continue completing the transaction. When you click Submit to post the transaction, Portico records the check transaction in the Financial Transaction History and Checks Received Detail Journal. The check images are sent to the Member Financial Transactions repository in Nautilus Essentials, and IMM Teller Item Capture add the checks to credit union's Check21 cash letter. Scanned check images can be viewed from the Checks Received Detail Journal on the same day. On the following day, you can view the transaction receipt and the check image included with the source documents from the primary member's financial transaction history.
If you click Scan, Edit or Delete on the Check Log dialog box after you have scanned the checks, the IMM Teller Capture screen will appear. Any changes made on the IMM Teller Capture screen will overwrite entries that appear on the Check Log dialog box with the exception of on-us checks with a CAN. For example, if you scan 3 checks and add a local hold to one of the checks, then scan 5 more checks, all the scanned checks will appear in the Check Log dialog box, but the local check hold will need to be re-added.
Any checks scanned during Offline Processing will be immediately sent to IMM Teller Capture. If you need to change or remove the check transaction when posting the offline transactions to Portico, you will need to access the IMM Teller Capture application and manually remove the scanned check.
If several employees share a scanner or you have a busy day at the credit union, you can choose to postpone the scanning process until a later time. The FinancialTxns – User can ByPass Check Scanning security permission allows you to bypass the check scanning process. This permission is included in the Teller - Advanced Security group. You can add it to a credit union-defined security group using the Security Group Permissions – Update window.
If bypassing the check scanning process, you will manually enter the checks in the Check Log. When you click OK, an informational message will appear. Click No to complete the transaction as normal. Be sure to make note of the physical checks that need to be scanned and matched with the appropriate transaction.
You must enter each check individually in the Check Log. Errors will occur if you enter a single amount in the Check Log that represents a sum total of multiple checks. For example, if you manually enter a total of $5400.00, yet it is actually 200 individual checks that add up to $5400.00, you will incur issues when the checks are scanned later in the day. IMM Teller Item Capture will be unable to match the checks with the amount you entered in the Check Log.
You can scan checks after the transactions have been posted from the Check Scan dialog box, the Balancing and Close tab, or Checks Received dialog box.