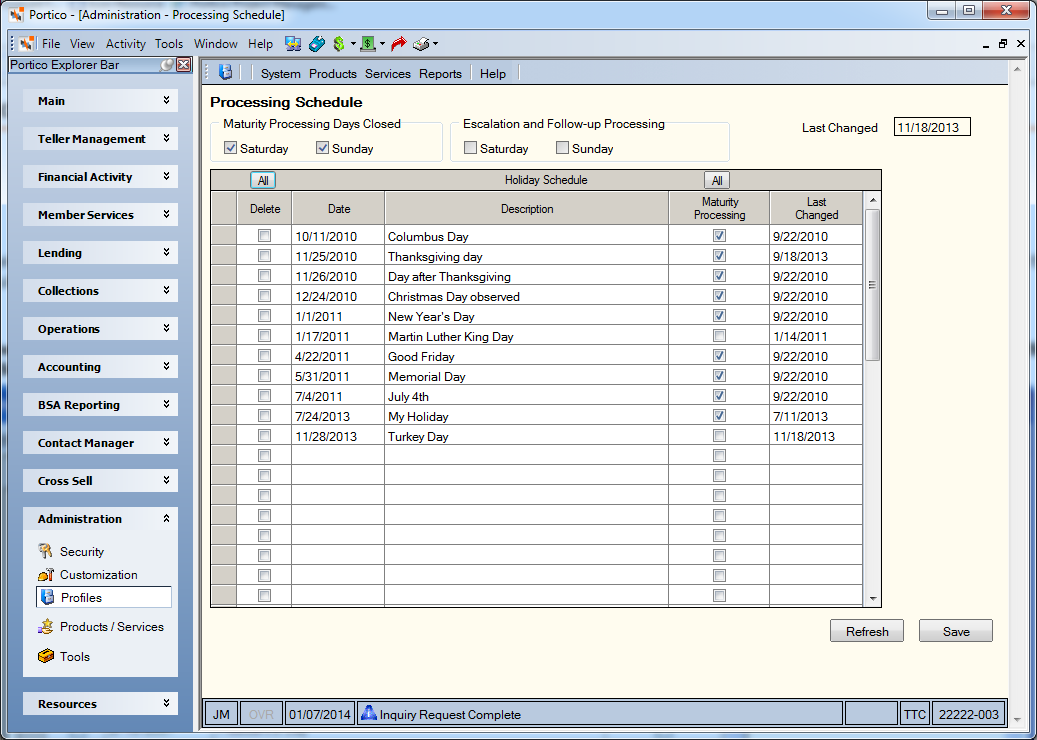
Setting Up the Processing Schedule
Use the Processing Schedule window to do the following:
-
Add the credit union’s list of holidays.
-
Identify which days the credit union closes for certificate maturity date calculations.
To open the Processing Schedule window, under Administration on the Portico Explorer Bar, select Profiles. On the Profiles top menu bar, select System, then select Processing Schedule.

How do I? and Field Help
The Processing Schedule window is blank upon first access. Complete the following fields in the Holiday Schedule grid to set up your holiday schedule:
Select Save to store the list of holidays. Select Refresh to erase any unsaved items and redisplay the list without the items.
The system uses the Maturity Processing Days Closed group box and Maturity Processing checkbox column only for weekend or holiday maturity processing option.
If your credit union closes on all Saturdays, Sundays, or both:
-
Select the Saturday checkbox in the Maturity Processing Days Closed group box.
-
Select the Sunday checkbox in the Maturity Processing Days Closed group box.
In the Holiday Schedule grid, select the Maturity Processing checkboxes to identify which credit union holidays the system considers when extending a maturity date.
The system extends the certificate maturity date when:
-
The specified Maturity Date on the Certificates – General tab is the day before a closed day on the Processing Schedule window.
-
The certificate matures in that night’s back-office cycle, making the certificate funds available on the next day.
To take advantage of the weekend or holiday maturity processing option, the certificate type must produce maturity notices.
Perform weekend or holiday maturity processing during the back-office cycle of the maturity notice evaluation process.
-
Set up the Processing Schedule window before issuing maturity notices, at least 45 days before maturity.
-
Update the Processing Schedule window annually, at least 45 days before the next closure day of your credit union.
The Maturity Processing Days Closed group box and Maturity Processing checkbox column do not appear when no certificate types set up for weekend or holiday maturity processing option.
Refresh the Credit Union Profile if:
-
You set up at least one certificate type for weekend or holiday maturity processing.
-
The Maturity Processing Days Closed group box and Maturity Processing checkbox column do not appear.
Select Profiles in the Administration menu on the Portico Explorer Bar. On the Profiles menu, select System, then Select Profile Refresh.
The Last Changed field reflects the last date any changes you make to the Holiday Schedule grid. If you delete a holiday date, the Last Changed field reflects the most recent Last Changed date in the grid. The Last Changed field does not reflect changes to the Maturity Processing Days Closed group box.