Web Signature Activity Reports
If your credit union uses Web Signatures for Credit Unions, you can run your own reports. The Reports feature allows you to run, customize, schedule, and download and print reports for their account. Report data is generated continuously, and reports contain near real-time data from document activity.
When you run reports, you see information from your own user activity only. Account administrators see all account-level activity. Reports run in the application can return up to 5000 rows of data.
Reports Overview
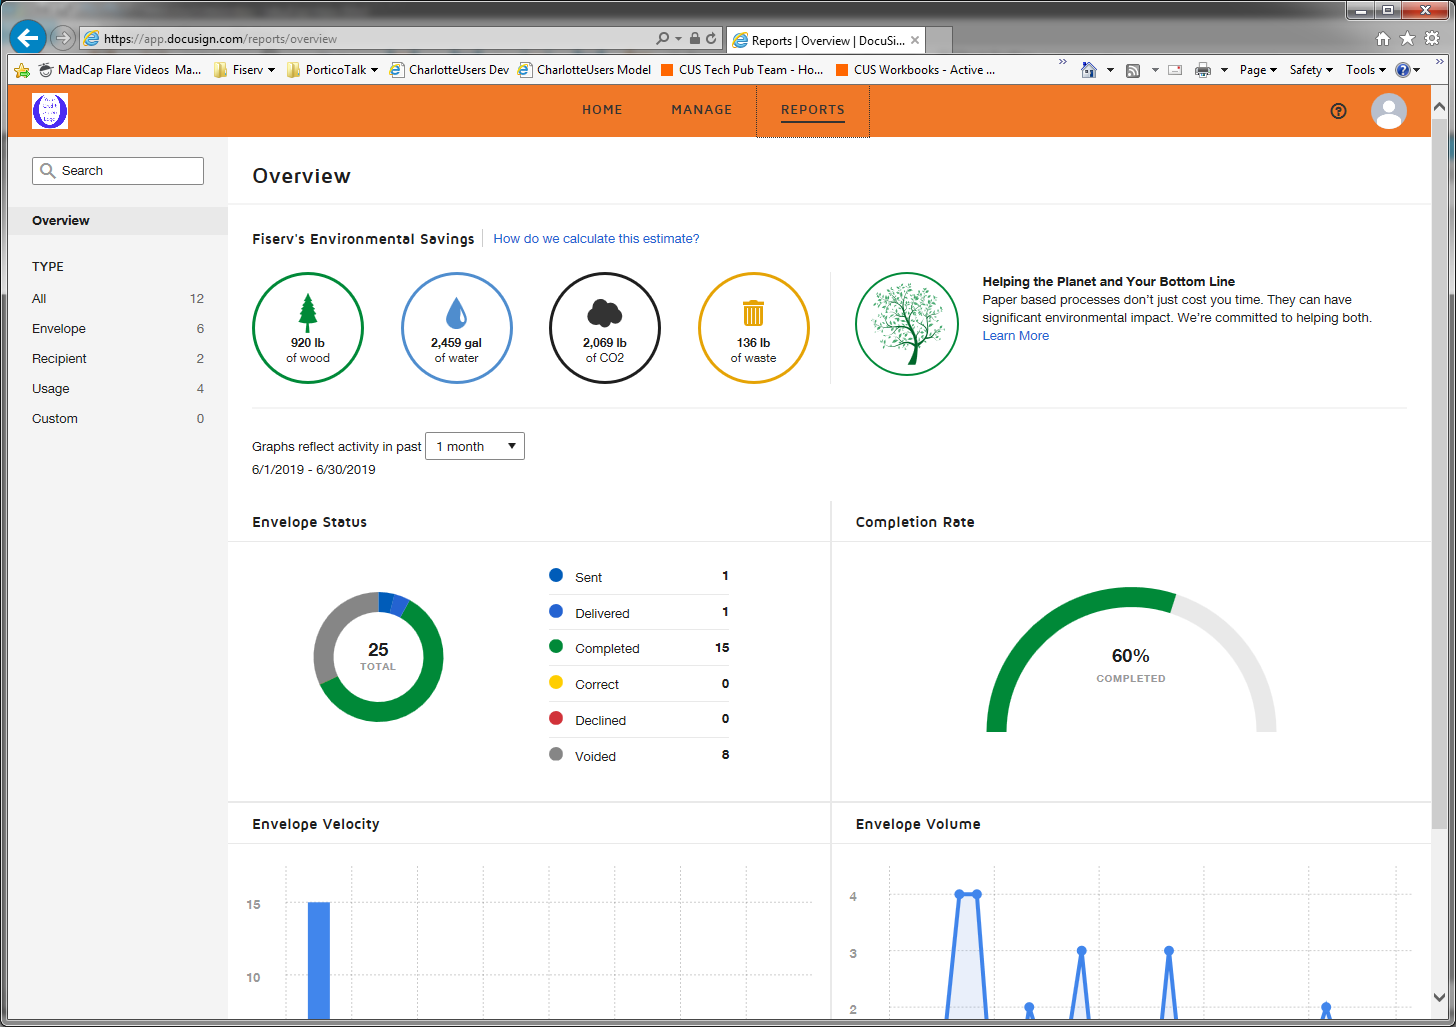
The Reports Overview provides a look at key metrics on your sent envelope activity. Use the Overview to quickly see overall envelope status, time to complete, and volume over time for the envelopes you send. The Overview covers document activity for the past 12 months and is available to all account users.

Standard Reports
Beyond the Overview, there are several standard reports provided to quickly view information about your account. These reports are categorized as follows:
- Envelope - available to all users; includes data on the envelopes you send
- Recipient - available to all users; includes data on the recipients of the envelopes you send
- Usage - for account administrators only; reflects activity and usage for the entire account

By default, all reports run with the following filters:
- Date Range: Month to Date
- Envelope Status: Any
- Sent By: Any
Custom Reports
You can alter the report filters to modify the information returned in the report. Set filters to create custom reports and save them for later use.
When you select a report to view from the Reports list, the default report data is shown. From this default result set, you can modify the date range, filters, and columns displayed to deliver the information you want to see. The results reflect the relevant document activity for your account. You can also export a report to a CSV file, or print your report for further use and analysis.
To modify report criteria:
- From the Reports page, select a report to view.
- In the Report Details view, modify the report criteria to display the data you want, using any of the following:
- Date Range. Use the drop-down to select a date range for your report. You can choose to filter by either Sent or Completed Date, and then select one of the predefined ranges, or select Custom Date Range and enter your own range.
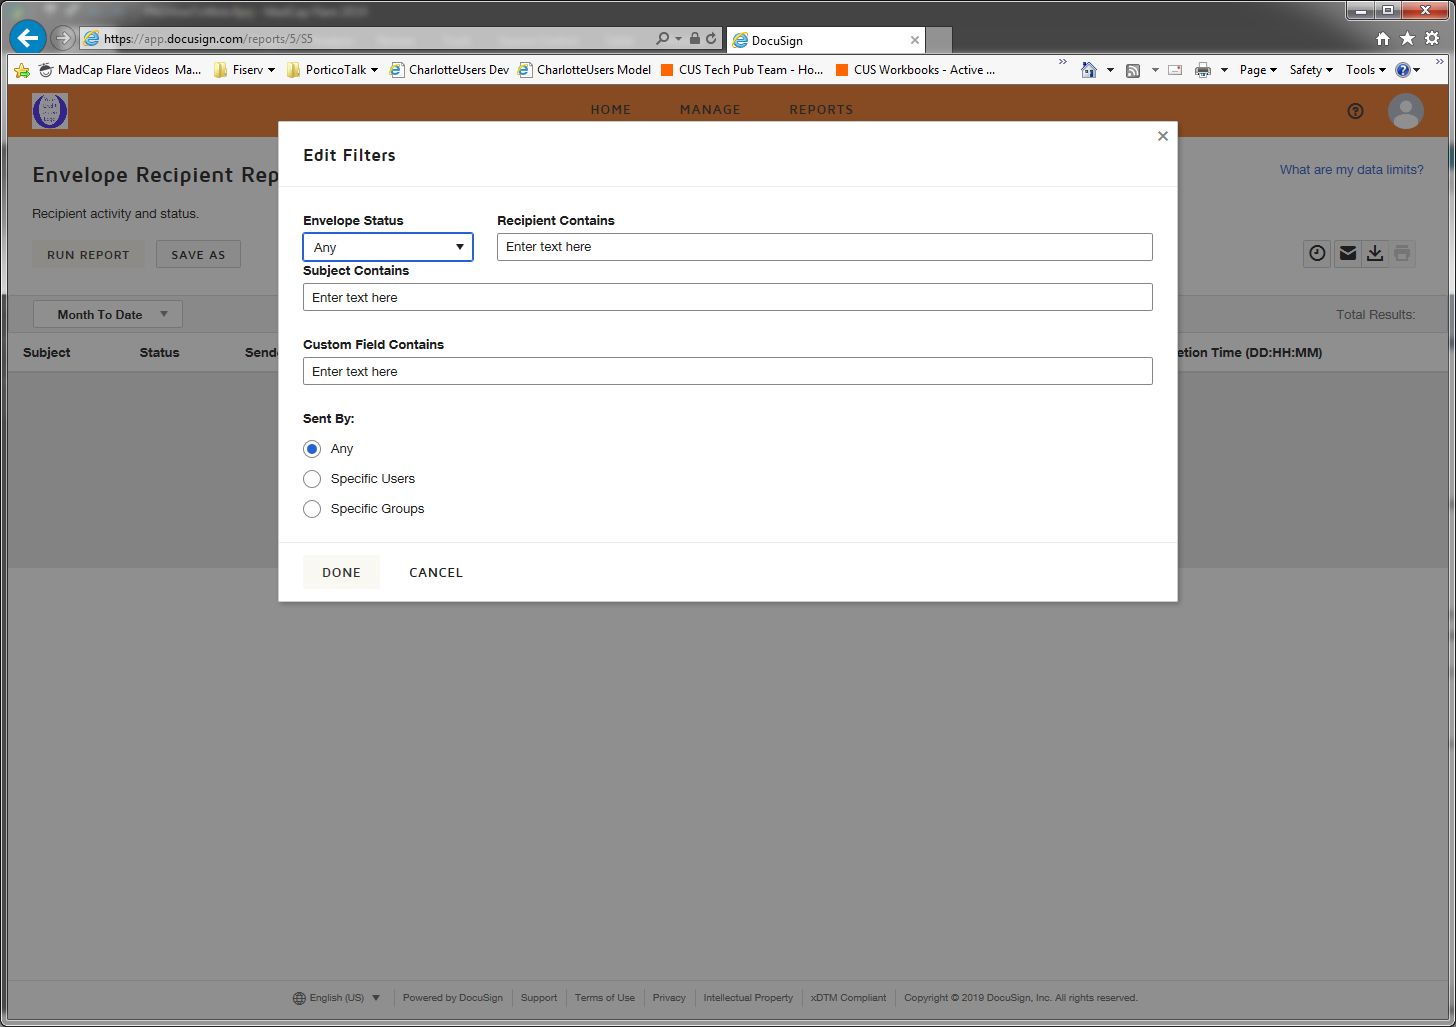
- Edit Filters. Modify the filter criteria to focus on the information you want to see. Different reports offer different filters. Depending on the report, you can enter criteria to select particular senders, envelope status, document subject, or recipient names. Enter your criteria and click DONE. The report data updates to reflect your changes.
- Edit Columns. Add or remove the columns displayed in the report. Reorder columns by selecting the drag handles and dragging the column to the desired place in the order. Click DONE to save your changes and update the report display. The report data updates to reflect your changes.

To create and save a custom report:
Starting from a standard report, select the criteria, such as date range or filters, and define how to display the results. Once you save your custom report, you can access it any time you want. You can save up to 100 custom reports at a time.
- From the Reports page, select a report to start with.
- In the Report Details view, modify the report to display the desired information by selecting the date range, filters, and columns to apply to your custom report.
- To save the custom report, click SAVE AS....
Note: If you started with a custom report, you can save your changes to the existing custom report (click SAVE), or save as a new custom report (click SAVE AS...).
- In the Save as Custom Report dialog box, provide a unique report title and a description, and click SAVE. Your custom report is saved and appears on the Reports list under Custom.
- To edit an existing custom report, select your report from the Reports page:
- To modify the report results, make the desired changes to the report criteria, and click SAVE.
- To edit the title or description of your custom report, click the pencil icon to the right of the title:
Schedule Reports
Finally, you can schedule reports to run automatically, download report data to a CSV file, and print reports.
You can set up a recurring schedule to automatically run reports. You can schedule both standard and saved custom reports. Scheduled reports start running at midnight, based on the time zone setting for your account.
You can also download or print reports, either from the Report Details view or from the history of a previously scheduled report.
You must sign in using your DocuSign credentials before downloading reports or CSV data files. DocuSign recommends that the person assigned to scheduling new reports, or extending existing reports, verify the list of recipients.
Limits
The following limits apply to reports:
- You can have up to 20 scheduled reports
- You can set schedule start and end dates for up to 365 days from the current date
- The History for a scheduled report contains the last 10 report instances
- Report instances are retained in the History for up to two years from the run date
- A scheduled report can contain up to 100,000 rows - additional data is truncated
To download or print a report:
- From the Reports page, select a report to view.
- In the Report Details view, modify the report to display the desired information.
- To download the report, click the download icon.
- The report data displayed downloads as a CSV file to your specified downloads folder.
- To print the report, click the print icon.
To schedule or edit a report schedule:
- From the Reports page, select a standard or a saved custom report to view.
- In the Report Details view, to schedule the report, click the clock icon.
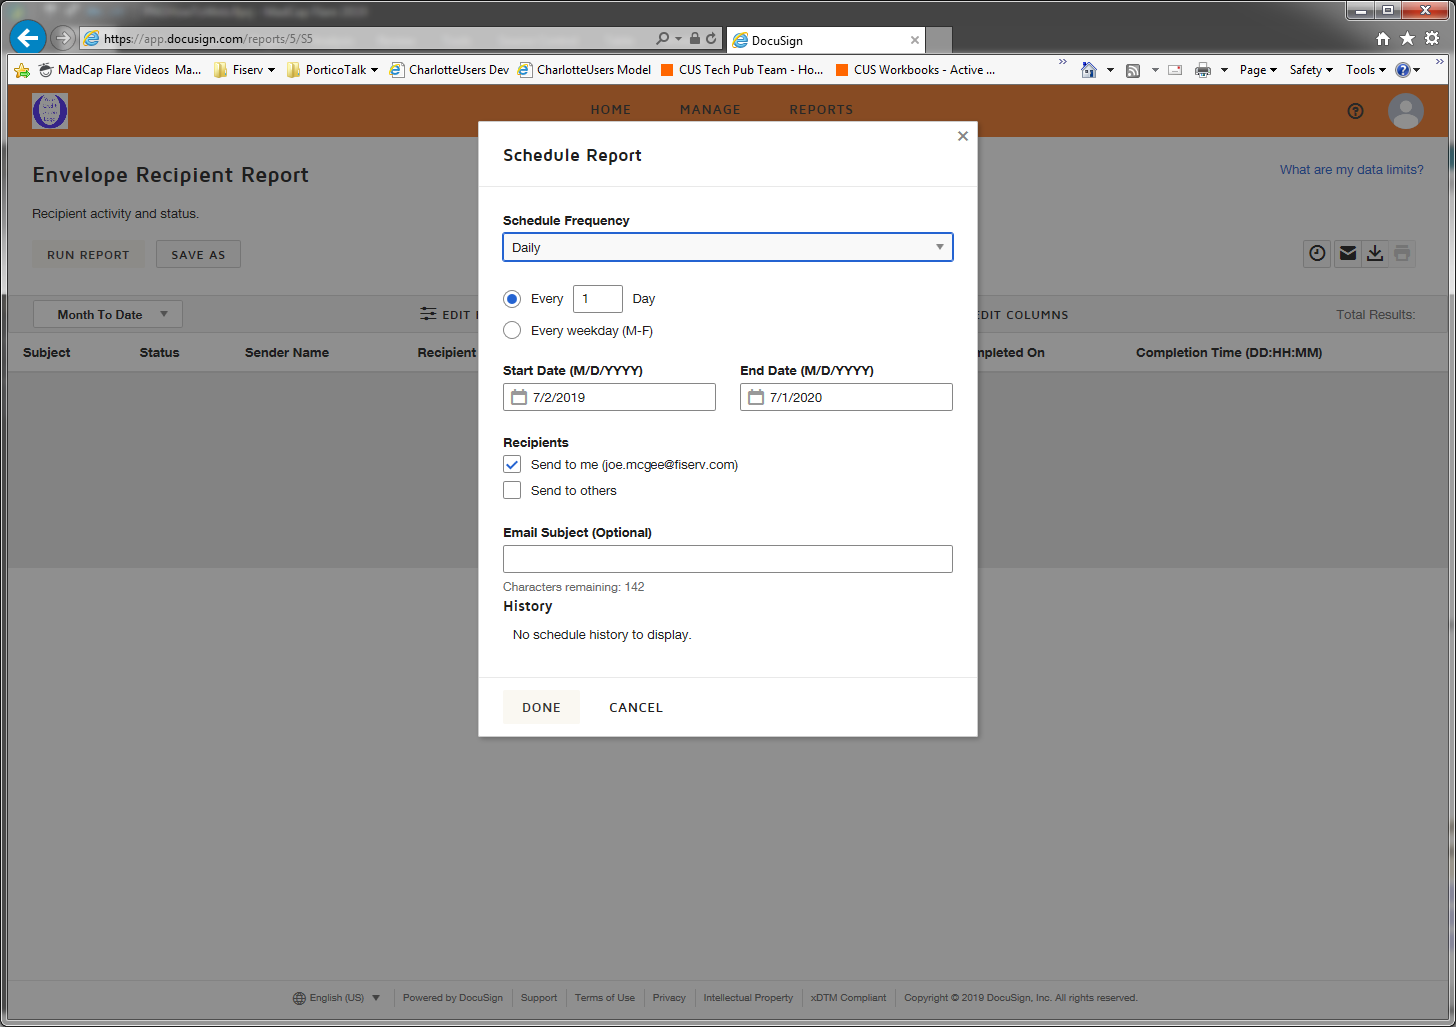
- In the Schedule Report dialog box, set up or edit the schedule details:
- Set the report frequency (e.g., Weekly on Mondays), and the start and end dates.
- Note: Start and end dates refer to the time frame in which to run the scheduled report; they do not impact the date range of the report itself.
- (Optional) To send the report to recipients by email, select the appropriate options. To send the report to others, select the option and enter the recipient email addresses, separated by a comma.
- (Optional) Enter a custom email subject. Only the first 142 characters are saved.
- Click Done to save the scheduled report. On the Reports list, a Scheduled flag is added to the report title:
- To edit a scheduled report, locate the report in the Reports list, then click the report menu and select Edit Schedule.
- In the Schedule Report dialog box, you can edit the schedule details or cancel the schedule by clicking DEACTIVATE.

To download a scheduled report:
- From the Reports list, locate the scheduled report you wish to download.
- Click the report menu and select Edit Schedule to open the Schedule Report dialog.
- In the History section, locate the specific report record you wish to download and click the download icon. The report is downloaded to your local machine.