Creating Statement Messages
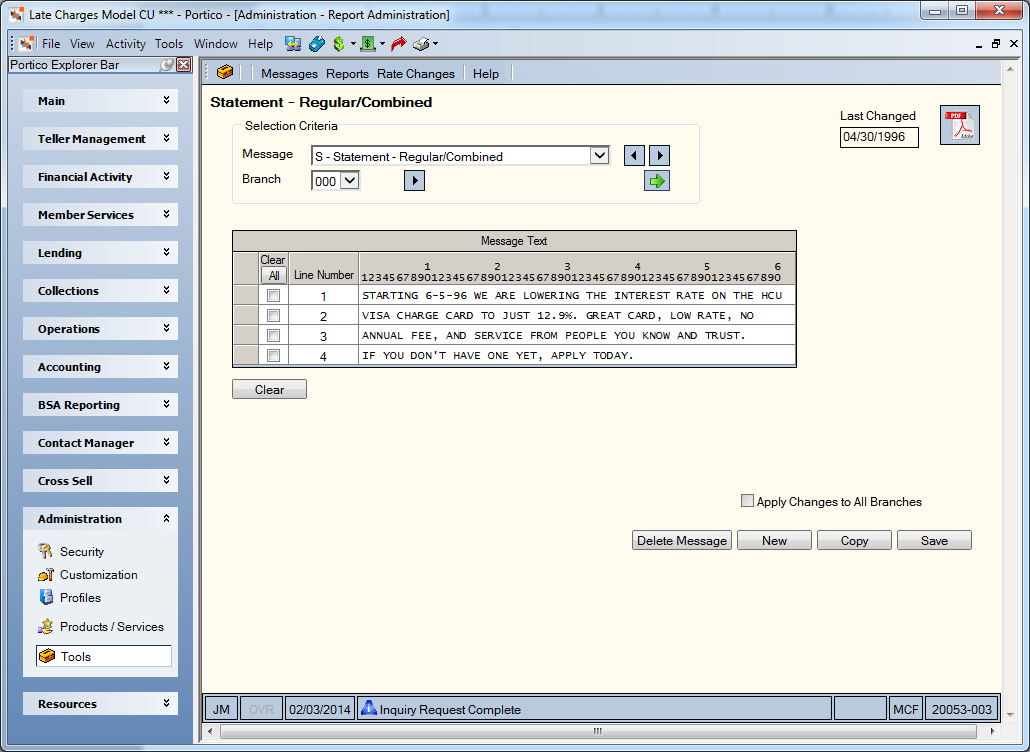
The Statement Messages window displays the list of messages you can customize. To access the Statement Messages window, on the Portico Explorer Bar, click Tools under the Administration menu. On the Tools menu bar, click Messages, point to Statements and click the statement type.

How do I? and Field Help
To create a customized message, enter the message in the Message Text grid.
| Column Heading | Description |
|---|---|
| Clear | Select the Clear check box to clear the text line. Click the All button to select all the check boxes. Click the All button again to clear all the check boxes. |
| Line Number | The line number of the text. |
| 1-6 | The character number of the text |
Click Save to save the message. The Last Changed field indicates the date the message was last changed.
Click Clear to clear the message text.
Select the Apply Changes to All Branches check box to change the message in all the credit union branches.
Click Copy to copy the message text to another branch.
Click New to create a new message.
Click Delete Message to delete the message.
To select another message, click the Message down arrow to select the message.
Click the Branch down arrow to select a different branch. Then, click the green arrow.
Click the PDF icon to view the report documentation.
To access the menus and windows, users must be assigned to the Portico - Tools - Messages security group or you can add these permissions to a credit union-defined security group using the Security Group Permissions – Update window.
- Portico - Messages - Menu Option
- Portico - Messages - Statements - Menu Option
- Portico - Messages - Statements - User Can View Statement Messages
- Portico - Messages - Statements - User Can Maintain Statement Messages
- Portico - Messages - Statements - User Can Delete Statement Messages
Portico Host: 910