View or Print Individual Notices
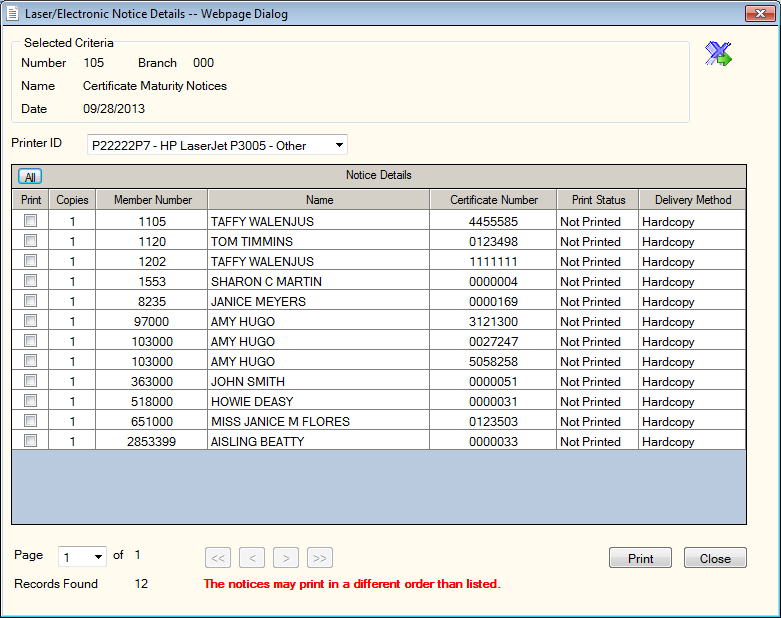
The Laser/Electronic Notice Details View dialog box lets you view and/or select individual notices to print that a specific back-office cycle generated.
To access the Laser/Electronic Notice Details View dialog box, on the Portico Explorer Bar, select Tools under the Administration menu. On the Tools menu bar, select Reports, and select Laser/Electronic Notices. On the Laser/Electronic Notices window, select Search to display all the notices available. You can refine your search by defining a branch, date, and/or report range in the Selection Criteria group box. Select the icon button in the Details column to display the Laser/Electronic Notice Details View dialog box.

How do I? and Field Help
To print a notice, select the Printer ID down arrow to select the printer ID. Then, select the Print checkbox next to the notices you want to print. In the Copies field, enter the number of copies, if the value displayed is not the quantity that should print. Then, select Print to print the notices.
Select the All button on the grid column header to print all the notices. Select the export icon to export the list of notices to Microsoft Excel. Select Close to close the dialog box.
Select a page from the Page dropdown list to review a specific page. Select the single left and right arrows to scroll through the results page by page, or select the left and right double arrows to go to the first and last page of the results.
You can print multiple copies of the notices. If you elect to image the notices, the Notices repository in Nautilus Essentials stores them and they appear on the History – Notice History tab.
Notice images stored in Nautilus Essentials and Electronic Document Delivery (EDD) will look like the paper copies produced, except for the Loan Delinquency Notice. The Loan Delinquency Notice stores a credit union version as the second page where only the member version page 1 prints.