Check Scan
Users with security to bypass check scanning may choose to scan checks after processing transactions and generating the receipt by selecting Check Scan from the Activity menu.
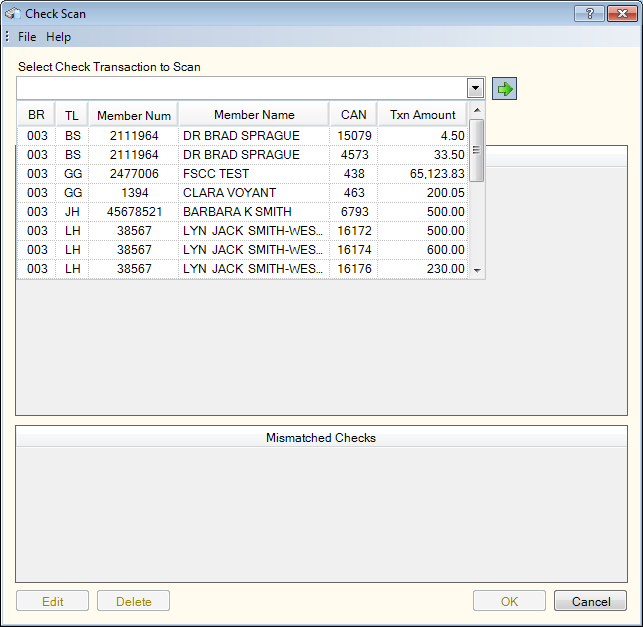
To access the Check Scan dialog box, click Check Scan from the Activity menu.

How do I? and Field Help
The Select Check Transaction to Scan drop-down lists the Checks Received transactions from all your branches, in which the physical check was not scanned. This allows an employee in any branch to scan all the checks for the credit union. A check will remain in the Select Check Transaction to Scan drop-down list until it has been scanned and matched.
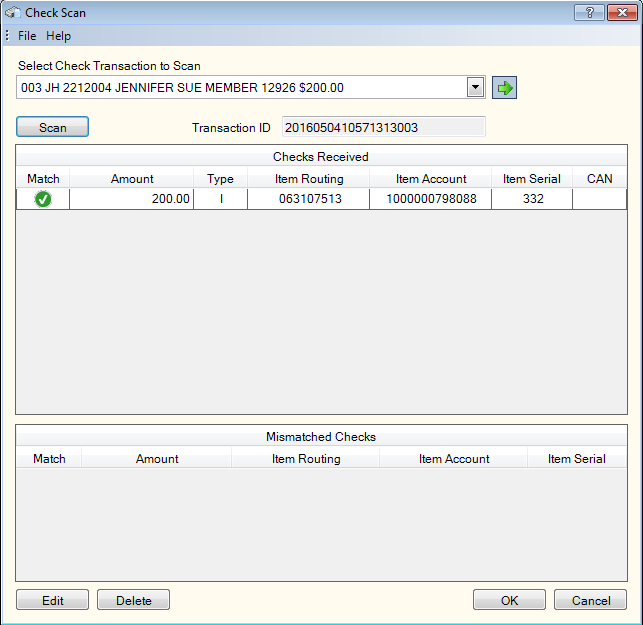
From the Select Check Transaction to Scan drop-down list, select the check transaction. The check amount, item account and serial number, and CAN from the Check Log appear in the Checks Received grid. Click Scan to display the IMM Teller Item Capture screen and complete the scanning process.
On the IMM Teller Item Capture screen, verify the check amount and enter the total deposit amount in the Amount field for the deposit slip. When the balancing status is Balanced, click Done.
If the scanned check matches the check transaction, an icon will appear in the Match column in the Checks Received grid. The Transaction ID column will display the check transaction reference ID.

Click OK to update the Checks Received Journal, send the check images to the Member Financial Transactions repository in Nautilus Essentials, and instruct IMM Teller Item Capture to add the check to the credit union's Check21 cash letter. Repeat the process until you have scanned and matched all the checks.
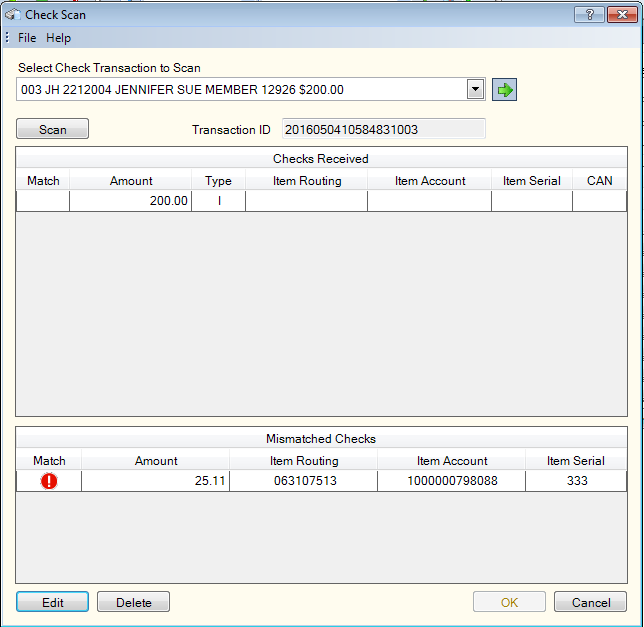
If a match cannot be found, the check transaction appears in the Mismatched Checks grid. Click Edit to display the IMM Teller Item Capture screen and modify the scanned check information.

To delete a check transaction from the Check21 cash letter, click Delete. You must reverse the transaction using the Reversals - Same-Day Reversals tab.
You cannot reverse checks in a closed/submitted cash letter in Teller Item Capture. Portico displays a warning message when attempting Same Day Reversals for transactions with checks received.
Click the green arrow to refresh the list of checks in the Select Check Transaction to Scan drop-down list.
Click Cancel to close the Check Scan dialog box without scanning the checks.
The Checks Received and Mismatched Checks grid displays the following information
| Column Heading | Description |
|---|---|
| Match | If the scanned check matches the check transaction, a green check mark icon will appear in the Match column in the Checks Received grid. If a match cannot be found, the check transaction appears in the Mismatched Checks grid and a red exclamation point icon will appear in the Match column. |
| Amount | The amount of the check. |
|
Type |
The type of check hold.
|
|
Item Routing |
The 9 digit item routing number. |
|
Item Account |
The 18 digit item account number. |
|
Item Serial |
The 6 digit serial number on the check. |
| CAN (appears in Checks Received grid only) |
The CAN associated with the scanned check. |