Reporting a Decline
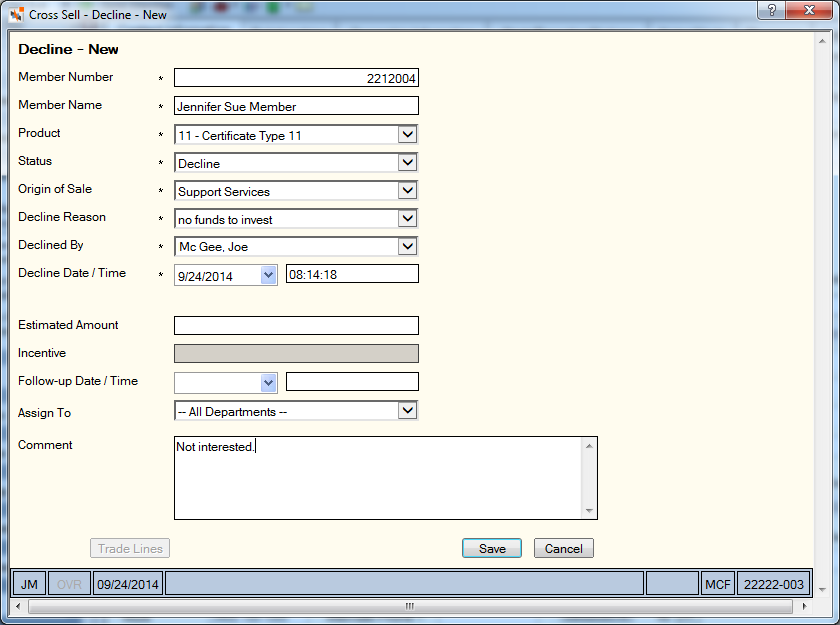
The Decline- New window lets you enter information about a declined product or service. To open the Decline - New window from the Opportunities pop-up window, select a cross sell plan from the Opportunities grid. Then, click the decline shopping bag icon to open the Decline - New window.

How do I? and Field Help
To open the Decline - New window from the tool bar, click the down arrow next to the shopping bag icon and click Decline. When the Referral - New window appears, the following fields are automatically completed, but can be modified as needed:
| Field | Description |
|---|---|
|
The account number associated with the member. If the window is accessed from the Cross Sell Opportunities window, this field will contain the account number of the member currently being processed in Portico. Length: 12 numeric |
|
|
The name of the member. If the window is accessed from the Cross Sell Opportunities window, this field will contain the name of the member currently being processed in Portico. Length: 23 alphanumeric |
|
|
Click the down arrow to select the product or service the member declined. If the window is accessed from the Cross Sell Opportunities window, this field will contain the product or service associated with the cross sell plan selected on the Cross Sell Opportunities window. For manual declines, the Product drop-down list on the Decline - New window will list the product groups followed by specific products and services This field is disabled if the product or service declined is associated with an MCIF product group. |
|
|
The incentive offered for the declined product or service. If the window is accessed from the Cross Sell Opportunities window, this field will contain the incentive defined for the cross sell plan. Administrative authority is required to modify this field. Length: 7 numeric |
Complete the remaining required fields indicated with an asterisk (*):
Complete the following optional fields if desired:
| Fiekd | Description |
|---|---|
|
The estimated amount of the declined product or service. Length: 12 numeric |
|
|
Click the down arrow to select a date the member should be contacted from the calendar or enter the date in MM/DD/YYYY format. |
|
|
The time the member should be contacted in HH:MM:SS military format. |
|
|
Click the down arrow to assign the follow-up to a specific department. |
|
|
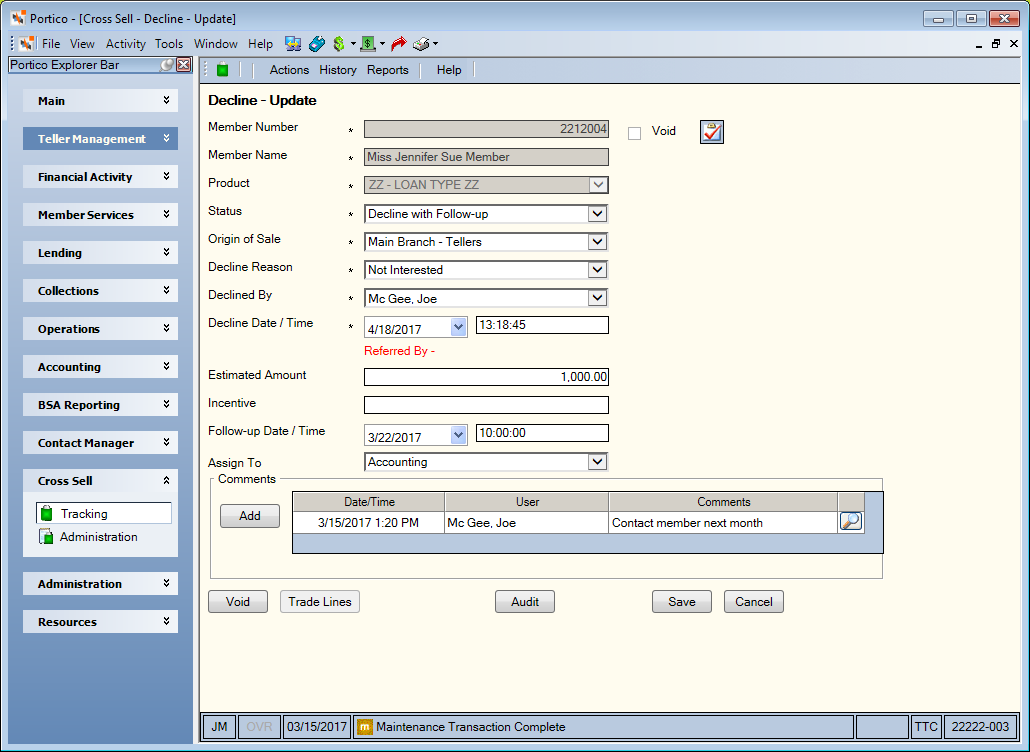
Additional comments about the decline. To assist you with protecting cardholder data, an algorithm is used to determine if card data has been entered in the Comment field. If card data is identified, a warning message will appear. You can click OK to continue saving the date or click Cancel to remove or mask the card data. In the Comment group box on the Decline - Update window, click Add to add comments about the existing decline. The Comment - New window will appear. |
Click Save to save the decline information and close the window. Click Cancel to close the window without saving the decline information.
A Task Reminder icon will appear on the Decline - Update dialog box. Click the Task Reminder icon to add the task to your Outlook calendar. The member name and follow-up date appear on the Outlook task. To access the Task Reminder icon, you must be a member of the Portico – Outlook Tasks security group or you can assign the Outlook Tasks – User Can Create Outlook Tasks permission to an existing credit union-defined security group using the Security Group Permissions – Update window.

The Void check box will be checked if the decline was voided. Click Void to void the decline.