Maintaining Printer Assignments
The Print Profile dialog box lets you maintain workstation printer assignments.
On the menu bar, select Tools, point to Profiles, point to Print Profile, and select Printers. The Print Profile dialog box appears.
How do I? and Field Help
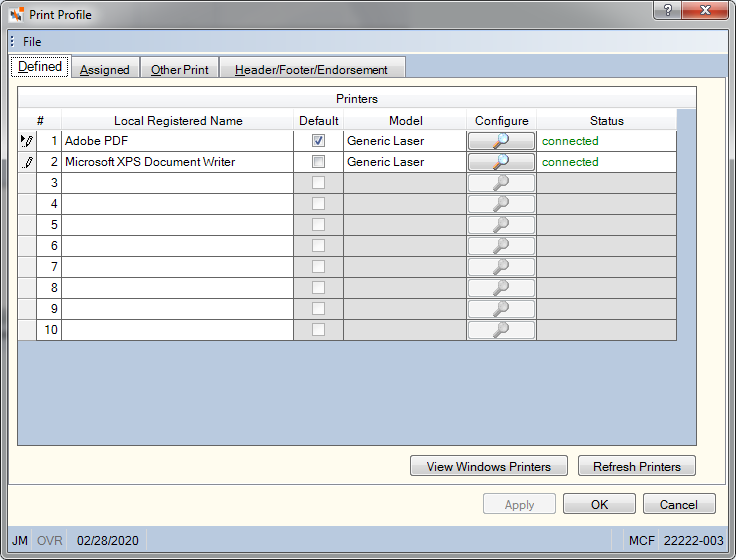
The Defined tab lets you set up the list of available printers.

To verify local printers, select View Windows Printers. Use the Printers grid to add a printer.
Select Refresh Printers after adding each new printer.
The Print Profile - Assigned - Online tab lets you define printers for specific print functions.

On the Print Profile - Assigned - Online tab, select the down arrow to select a printer from the dropdown list for each of the print types.
- Select the Receipts down arrow to select the receipt printer from the dropdown list.
- Select the Endorsement down arrow to select the endorsement printer from the dropdown list.
- Select the TA Teller Open/Close & Cash Movement down arrow to select the printer where the open, close and cash movement reports should print from the dropdown list. The Teller Open Reports automatically archive if your credit union uses Portico's printing functionality and Nautilus Essentials Documents. For Nautilus Essentials users, the Teller Work repository retains the Physical Cash Count (ACP) and Teller Drawer Open (ATO). The Teller Drawer Open (ATO) is accessible from the Teller Journaling – Transaction Journal tab.
- Select the Workflow down arrow to select the workflow printer from the dropdown list.
- Select the Administration down arrow to select the administration printer from the dropdown list.
- Select the Audit 1 down arrow to select the audit printer from the dropdown list.
- Select the Audit 2 down arrow to select the audit printer from the dropdown list.
- Select the Notices down arrow to select the notice printer from the dropdown list.
- Select the External Receipts down arrow to select the external receipt printer from the dropdown list.
- Select the CU Checks down arrow to select the CU checks printer from the dropdown list.
- Select the Cashier's Checks down arrow to select the cashier's checks printer from the dropdown list.
- Select the Operating Checks down arrow to select the operating checks printer from the dropdown list.
- Select the Temporary, Sight & Purchase Checks down arrow to select the temporary checks printer from the dropdown list.
- Select the Certificate down arrow to select the certificate printer from the dropdown list.
- Select the Member Status down arrow to select the member status report printer from the dropdown list.
- Select the Envelopes down arrow to select the envelopes printer from the dropdown list.
- Select the Amortization down arrow to select the amortization schedule printer from the dropdown list.
- Select the Shared Service Center History down arrow to select the Shared Service Center history printer from the dropdown list.
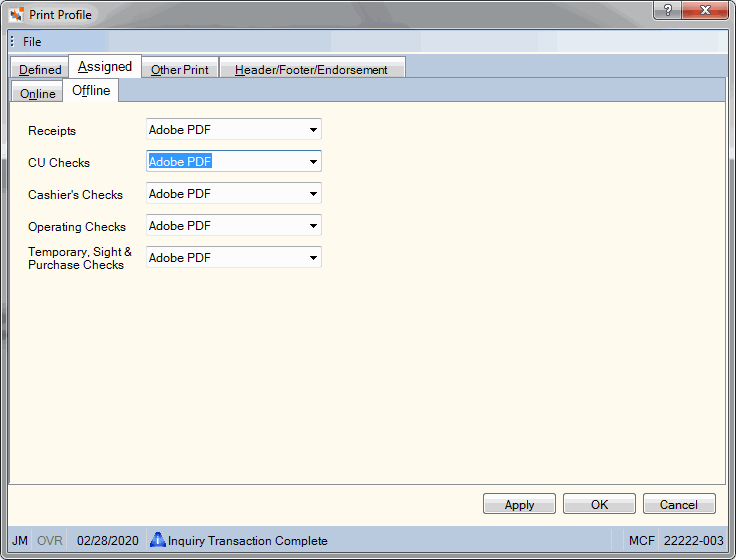
The Print Profile - Assigned - Offline tab lets you define the printers that you use when you are using Offline Processing.

On the Print Profile - Assigned - Offline tab, select the down arrow to select a printer from the dropdown list.
- Select the Offline Receipts down arrow to select the offline receipt printer from the dropdown list.
- Select the Offline CU Checks down arrow to select the CU checks offline printer from the dropdown list.
- Select the Offline Cashier's Checks down arrow to select the cashier's checks offline printer from the dropdown list.
- Select the Offline Operating Checks down arrow to select the operating checks offline printer from the dropdown list.
- Select the Offline Sight Draft/Purchase Draft down arrow to select the sight draft/purchase draft offline printer from the dropdown list.
On the Other Print tab, indicate if the teller open and closing reports should archive, the number of days to archive, and where to store the archived open and closing reports.

If you select the Archive Open/Closing Reports checkbox, the Teller Drawer Open (ATO), Physical Cash Count (ACP), and the Teller Closing reports archives to the location specified. Only use this option when a credit union does not have Nautilus Essentials.
In the Report Archive - days field, enter the number of days of opening/closing reports to archive. In the Report Archive - location field, enter the directory location to store the archived open and closing reports. Select the ellipsis button to browse to the correct location.
If your credit union uses Nautilus Essentials and you select the Archive Open/Closing Reports checkbox, the opening and closing reports print. If your credit union uses Portico's printing functionality and Nautilus Essentials Documents, the reports archive in Nautilus Essentials Documents in the Teller Work repository accessible using the View Documents dialog box. Contact Portico Customer Service if you are interested in storing your Teller Close Reports in the Teller Work repository in Nautilus Essentials Documents.
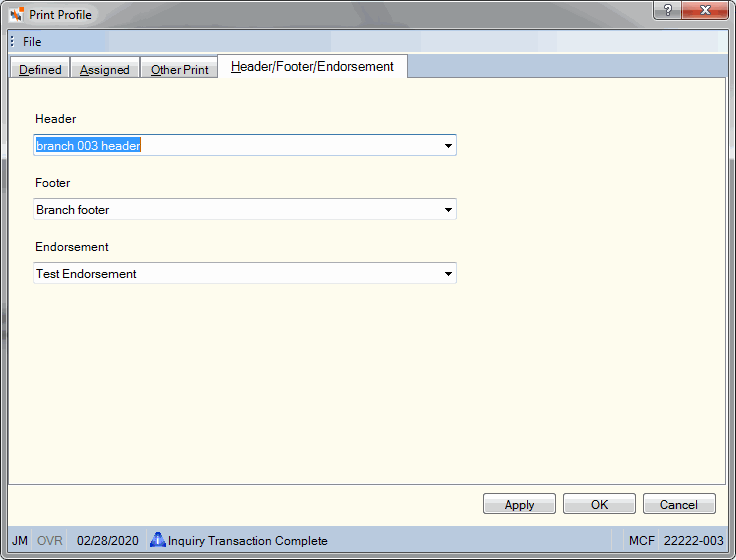
On the Header/Footer/Endorsement tab, select the header, footer and endorsement from the dropdown lists.
- Select the Header down arrow to select the header file containing the text that prints on the receipt header.
- Select the Footer down arrow to select the footer file containing the text that prints on the receipt footer.
- Select the Endorsement down arrow to select the endorsement file containing the signature text that prints on checks received at the credit union.

Select Apply to apply your changes to the Print Profile dialog box.
Select OK to save your changes and close the dialog box.
Select Cancel to cancel your changes and close the dialog box.