Defining Print Preferences
The Print Profile - Preferences dialog box lets you define the information that appears on your printed receipts and checks. On the menu bar, select Tools, point to Profiles, point to Print Profile, and select Preferences. The Print Profile - Preferences dialog box appears.
How do I? and Field Help
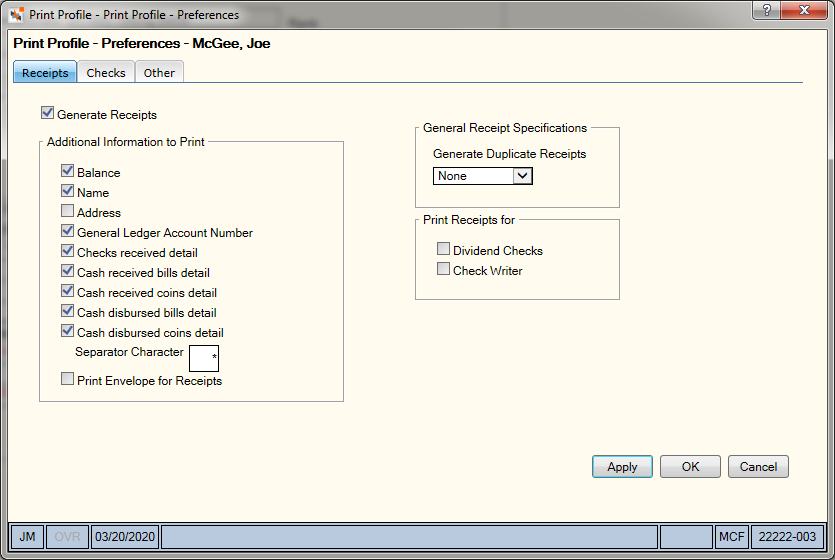
On the Print Profile - Preferences - Receipts tab, you can select the information that should appear on the printed receipts, define when duplicate receipts print, and indicate whether or not to print receipts for dividend checks and for checks generated using a check writer.
Select the Generate Receipts checkbox to print receipts or send email receipts. If you do not select the Generate Receipts checkbox , a receipt does not print or send through email regardless of the member’s receipt delivery preference; however, the receipt images to Nautilus Essentials.
The Additional Information to Print group box lists the optional information you can print on the receipt. The selections in the Additional Information to Print group box do not apply to email receipts. Portico uses the credit union-level settings defined on the Electronic Receipt Settings window for email receipts.
- Select the Balance checkbox to print the account balance on receipts.
- Select the Name checkbox to print the member's name on roll-type receipts only.
- Select the Address checkbox to print the member's address on continuous-form receipts only. If you do not select the Name checkbox and the credit union uses continuous-form receipts, the name still prints on the bottom of the continuous-form receipt.
- Select the General Ledger Account Number checkbox to print the general ledger account on the receipt for adjustments made using the Adjustments tab.
- Select the Checks received detail checkbox to print checks received on receipts.
- Select the Cash received bills detail checkbox to print bills received on receipts.
- Select the Cash received coins detail checkbox to print coins received on receipts.
- Select the Cash disbursed bills detail checkbox to print bills disbursed on receipts.
- Select the Cash disbursed coins detail checkbox to print coins disbursed on receipts.
- In the Separator Character field, enter the character used to separate information about the receipt.
- Select the Print Envelope for Receipts checkbox to print an envelope for receipts.
You can choose to print duplicate receipts for all receipts or for bond redemptions. From the Generate Duplicate Receipts dropdown list, select Bonds to print duplicate receipts for bond redemptions only. Select All to print duplicate receipts for all receipts, or select None to not print duplicate receipts.
You can also print receipts for dividend checks and credit union checks generated using a check writer.
- Select the Dividend Checks checkbox to print receipts for dividend checks.
- Select the Check Writer checkbox to print receipts for check writer.
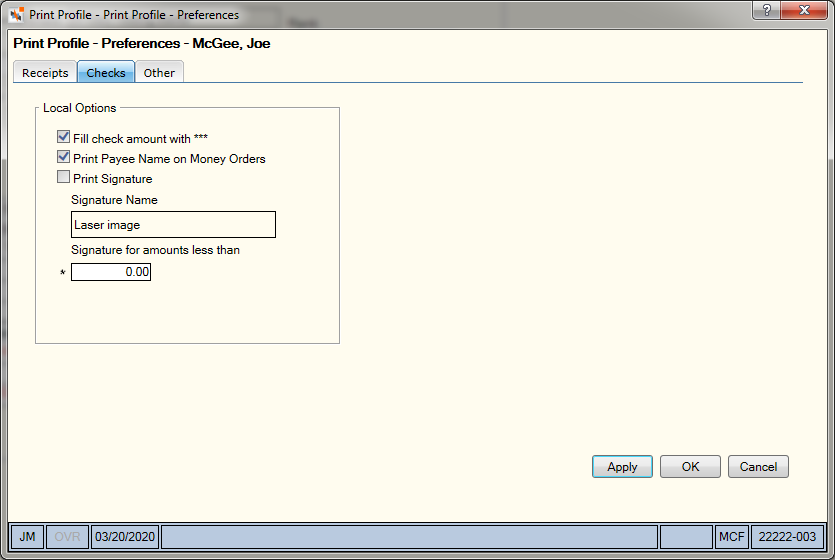
On the Print Profile - Preferences - Checks tab, you can indicate what should print on checks and money orders.
- Select the Fill check amount with *** checkbox to enter *** in the check amount.
- Select the Print Payee Name on Money Orders checkbox to print the payee name on money orders.
- Select the Print Signature checkbox to print signatures on checks of a specific amount.
- In the Signature Name field, enter the name of the signature file required on checks
- In the Signature for amounts less than field, enter the check amount that requires a signature.
On the Print Profile - Preferences - Other tab, you can define when member numbers should print and indicate if cash movements, teller open reports, teller closing reports, and adding machine information should print.
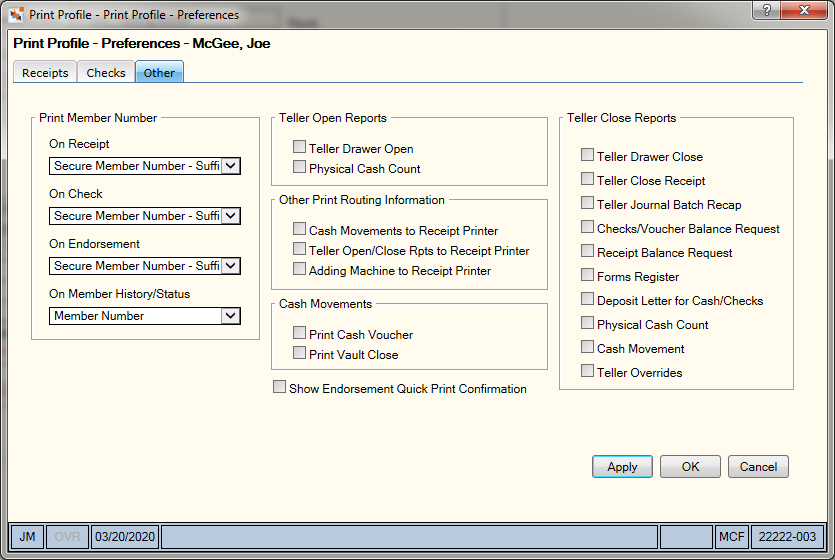
The fields in the Print Member Number group box determine when the member number should print.
- From the On Receipt dropdown list, select how member numbers should print on receipts. The selection in the On Receipt dropdown list does not apply to email receipts. Portico uses the credit union-level settings defined on the Electronic Receipt Settings window for email receipts.
- From the On Check dropdown list, select how member numbers should print on checks.
- From the On Endorsement dropdown list, select how member numbers should print on endorsements.
- From the On Member History/Status dropdown list, select the default secure member number option used when printing member history, member status, loan status and collection status. The value selected appears in the Secure Member Number dropdown list on the Print Member History, Print Member Status, Print Loan Status and Print Collection Status dialog boxes.
From each dropdown list, you can select:
- No Member Number - No member number prints. The system masks the taxpayer ID number.
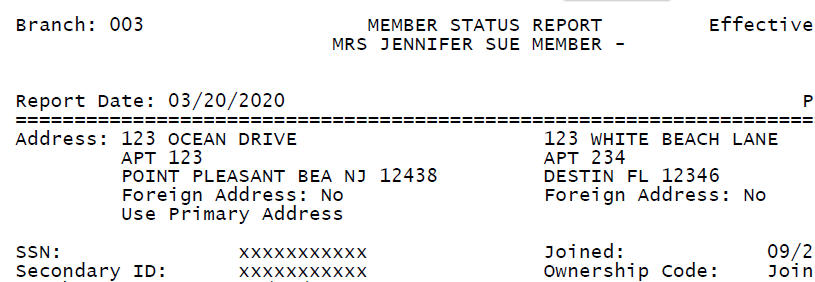
- Member Number - The complete member number and taxpayer ID prints.
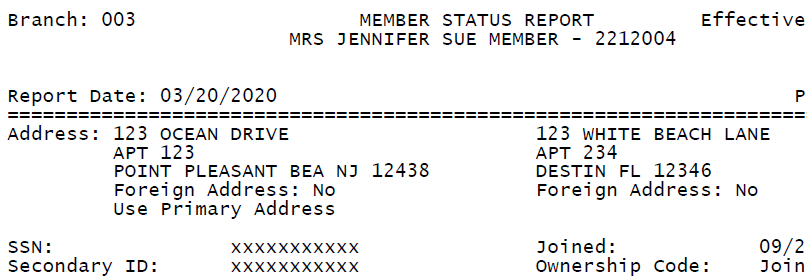
- Secure Member Number - Suffix - A secure member number prints. The first 4 digits of the member number followed by three asterisks prints. The system masks the taxpayer ID.
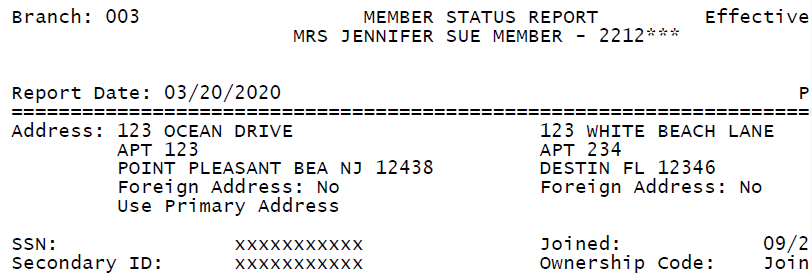
- Secure Member Number - Prefix - A secure member number prints. Three asterisks followed by the last 4 digits of the member number prints. The system masks the taxpayer ID.
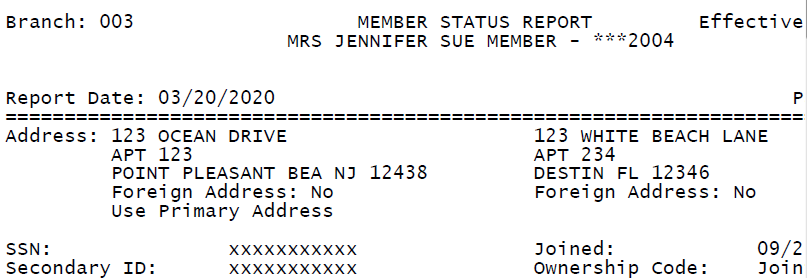
The Teller Open Reports group box lets you select the sections of the Teller Administration Teller Open Reports you want to print. The checkboxes in the Teller Open Reports group box defaults to selected (print). If you do not want the reports to print, you must clear the checkboxes.
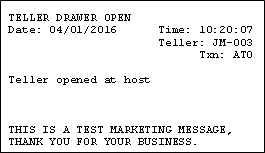
Select the Teller Drawer Open checkbox to print the Teller Drawer Open report. The Teller Drawer Open report prints to the receipt printer.
Select the Physical Cash Count checkbox to print the Physical Cash Count. The Physical Cash Count report prints to the printer specified in the TA Teller Open/Close & Cash Movement field on the Print Profile - Assigned - Online tab. This report only prints if you select the Verify Cash checkbox on the Credit Union Profile - Teller tab.
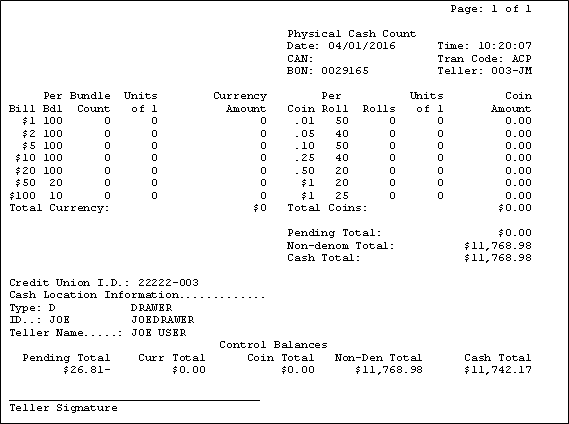
When the teller close process is complete and the reports generate, the option selected in the Other Print Routing Information group box determines how the information routes to the desired printers.
Select the Cash Movements to Receipt Printer checkbox to print Cash Movements on the receipt printer. When you select the Cash Movements to Receipt Printer checkbox, the Cash Movements (ACM/ACS) and Physical Cash Count (ACP) prints to the Receipt Printer. Requires that the receipt printer uses slip inserts to print.
Select the Teller Open/Close Rpts to Receipt Printer checkbox to print the teller open and teller close reports on the receipt printer. The print locations for the teller close reports is based on the checkboxes you selected:
| Teller Close Report | Only the Teller Open/Close Rpts to Receipt Printer checkbox is selected | All or some of the checkboxes are selected in the Teller Close Reports group box |
|---|---|---|
|
Teller Drawer Close (ATC) |
Receipt Printer |
Teller Close Printer |
|
Teller Journal Batch Recap (ATB) |
Does Not Print |
Teller Close Printer |
|
Checks/Voucher Balance Request (ATK) |
Receipt Printer |
Teller Close Printer |
|
Receipt Balance Request (ATR) |
Receipt Printer |
Teller Close Printer |
|
Forms Register (AFI) |
Does Not Print |
Teller Close Printer |
|
Deposit Letter for Cash/Checks (DL) |
Teller Close Printer |
Teller Close Printer |
|
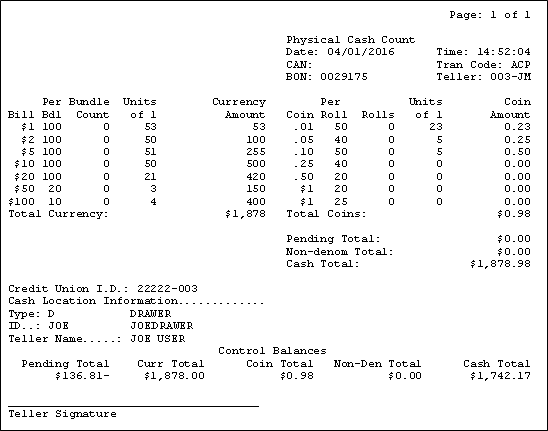
Physical Cash Count (ACP) |
Teller Close Printer |
Teller Close Printer |
|
Cash Movements (ACM/ACS) |
Teller Close Printer |
Teller Close Printer |
|
Teller Overrides (ATJ) |
Teller Close Printer |
Teller Close Printer |
|
Teller Drawer Status (Receipt) |
Receipt Printer |
Receipt Printer |
Select the Adding Machine to Receipt Printer checkbox to print the adding machine tape on the receipt printer.
In the Cash Movements group box, you can define the system defaults for the Print Cash Voucher checkbox on the Cash Control – Movements tab and Print Vault Close checkbox on the Vault Balancing tab. If your credit union archives your teller close reports to Nautilus Essentials Documents, the cash voucher and the vault close report image automatically to Nautilus Essentials Documents in the Teller Work repository. You can access the cash vouchers and vault close reports using the View Documents dialog box.
- The system selects the Print Cash Voucher checkbox as default. Clear the Print Cash Voucher checkbox on the Other tab to set the Print Cash Voucher checkbox on the Cash Control – Movements tab to not selected.
- The system selects the Print Vault Close checkbox as default. Clear the Print Vault Close checkbox on the Other tab to set the Print Vault Close checkbox on the Vault Balancing tab to not selected.
Select the Show Endorsement Quick Print Confirmation checkbox to display the endorsement confirmation message.
In the Teller Close Reports group box, you can select the sections of the Teller Administration Teller Close Reports you want to print.
Select the Teller Drawer Close checkbox to print the Teller Drawer Close Report.

Select the Teller Close Receipt checkbox to print the Teller Close Receipt.
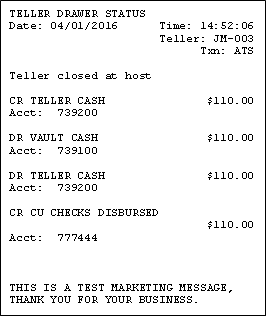
Select the Teller Journal Batch Recap checkbox to print the Teller Journal Batch Recap.

Select the Checks/Voucher Balance Request checkbox to print the Checks/Voucher Balance Request.

Select the Receipt Balance Request checkbox to print the Receipt Balance Request.

Select the Forms Register checkbox to print the Forms Register.

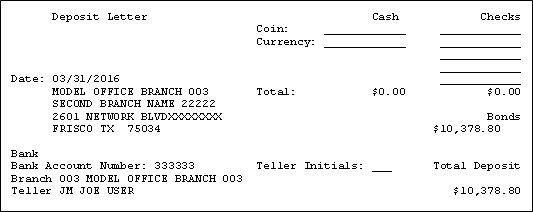
Select the Deposit Letter for Cash/Checks checkbox to print the Deposit Letter for Cash/Checks.
Select the Physical Cash Count checkbox to print the Physical Cash Count.
Select the Cash Movement checkbox to print the Cash Movement.
Select the Teller Overrides checkbox to print the Teller Overrides.
If you select the Archive Open/Closing Reports checkbox on the Print Profile - Printers - Other Print tab, the Teller Drawer Open (ATO), Physical Cash Count (ACP), and the Teller Closing reports archive to the location specified. Only use this option when a credit union does not have Nautilus Essentials. If your credit union uses Nautilus Essentials and you select the Archive Open/Closing Reports checkbox , the opening and closing reports print.
If your credit union uses Portico's printing functionality and Nautilus Essentials Documents, Nautilus Essentials Documents in the Teller Work repository accessible using the View Documents dialog box can archive the reports.
Contact Portico Customer Service if you are interested in storing your Teller Close Reports in the Teller Work repository in Nautilus Essentials Documents. The teller close information also appears on the Audit Trail Report 990.
Select Apply to apply your changes to the Print Profile - Preferences dialog box.
Select OK to save your changes and close the dialog box.
Select Cancel to cancel your changes and close the dialog box.