Adding a Customized Message
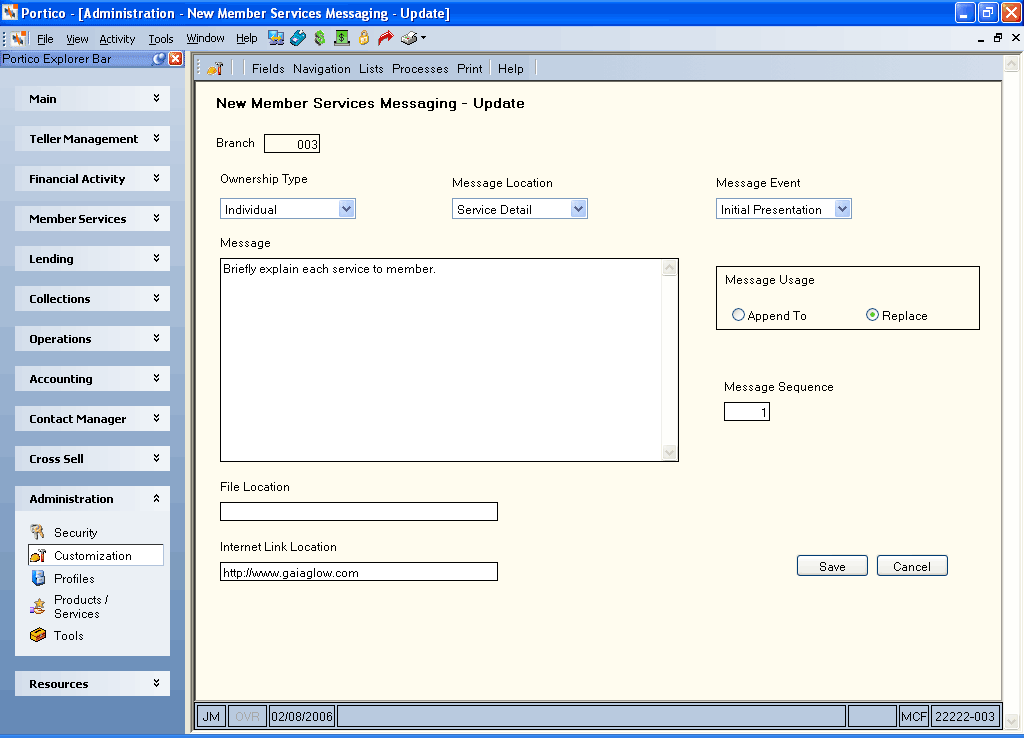
The New Member Services Messaging – New/Update window lets you add or update messages that can be used to assist employees in setting up products and services for a member using the New Members & Services windows. Branch, message sequence, ownership type, message location, and message event options control when the message will appear within New Members & Services.
To access the New Member Services Messaging - New/Update window, under Administration on the Portico Explorer Bar, select Customization. On the Customization top menu bar, point to Processes on the menu bar, then select New Member Messaging. The New Member Services Messaging - List window appears.
- Select a message and select Copy to open the New Member Services Messaging - Update window and copy a message.
- Select New to open the New Member Services Messaging - New window and create a new message.
- Select a message to open the New Member Services Messaging - Update window and update the message.


How do I? and Field Help
Complete the following steps to add or update a message.
- The Branch field defaults to the branch you selected in the Search Criteria box on the New Member Services Messaging - List window. This is the branch where the message appears within New Members & Services. Branch 000 contains the default messages for all branches. If you set up a message for branch 000 it appears in all branches, unless the Replace option is selected on the New Member Services Messaging - New/Update window. If adding a new message, you can accept the default branch or enter a new branch.
- Select the Ownership Type down arrow to select the corresponding account ownership type.
- Select the Message Location down arrow to select where the message should appear.
- Select the Message Event down arrow to select when the message should appear. The valid options are: Initial Presentation, Upon Completed Service and On Next Button.
- In the Message box, enter the message.
- If a message is set up in a branch other than branch 000 (that is, branch 003) and the Ownership Type, Message Location, and Message Event fields match an existing branch 000 message.
- Select the Append To option to add the message to the existing default message from branch 000 in the specified branch (that is, branch 003).
- Select the Replace option to replace the default message from branch 000 with this message in the specified branch (that is, branch 003).
- In the Message Sequence field, enter the sequence of the message if there are multiple messages set up for the same ownership type, location, and event. Valid values are 1-9.
- In the File Location field, enter the location of credit union documentation that can assist the employee.
- In the Internet Link Location, enter a URL address that can assist the employee.
- Select Save to save the message. The message appears in a pop-up window when you are completing the member application in New Members & Services. If a file or link is associated with the message, the corresponding icon will be enabled.
Select Cancel to disregard your changes and close the window.