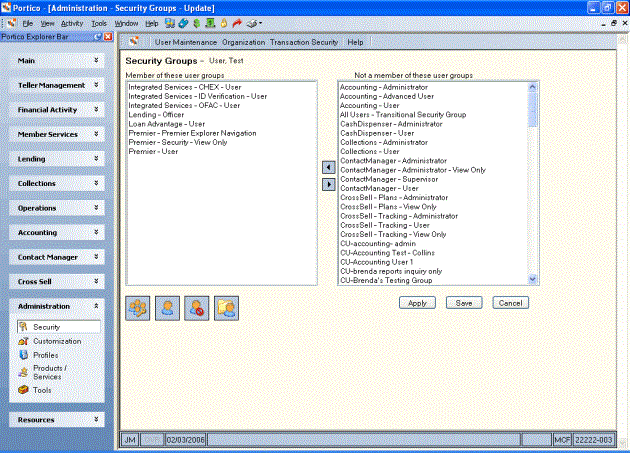
Assigning Users to a Security Group
The Security Groups window lets you assign a user to one or more security groups. To open the Security Groups window, under Administration on the Portico Explorer Bar, select Security. On the Security top menu bar, select User Maintenance, then select Users. The Users - List window appears. On the Users List window, select the user, then select the security groups icon button. The Security Groups window appears.

How do I? and Field Help
To assign the user to a security group, select the security group in the Not a member of these groups box and select the left arrow.
To remove the user from a specific security group, select the security group in the Member of these user groups box and select the right arrow.
When a user is removed from a security group, Portico will review the existing members of the security group and automatically remove any users with a Delete Pending status.
Select a security group and select the permissions icon button to open the User Group - Update window and assign permissions to a security group.
Select the user icon button to open the User - Update window and modify the user's basic security information.
Select the restrictions icon button to open the Security Restrictions window and modify the user's restrictions.
Select the profile icon button to open the User Profile - Update window and modify the user's preferences, logon settings and window options.
Select the override groups icon button to open the Override Groups window and assign the user to an override group.
Select Apply to apply the user group assignments. Select Save to save the user group assignments and close the window.
Select Cancel to close the window without saving the user group assignments.
The user must log off and log back into Portico for the changes to take effect.